Copyright © 2000, William Weiland
The best seller display module interfaces with the internal Merchant 5.x statistics modules to provide your customers with similar best seller information previously only seen by the store owner in the admin interface. It goes a step further by breaking down the best seller information by category. Your customers will not see exact numbers sold, only relative ranking. As they see the best sellers listed, the display provides them with a convenient link to the individual products so that they too can see what all the excitement is about. You can reset the statistics through the existing admin statistics interface so that your best sellers can be kept current as product inventory changes.
1) In admin, click Add Modules link (fig 2)
2) Click the file upload button
3) Browse to find the bestsell.mvc file on your hard drive and upload (fig 3)
4) Click Add to add it to the domain
5) Then in admin click on the plus to the left of Stores
6) Click the plus to the left of your store name
7) Click on the word Utilities under your store (fig 9)
8) Check the box next to Best Seller Display
9) Click Update
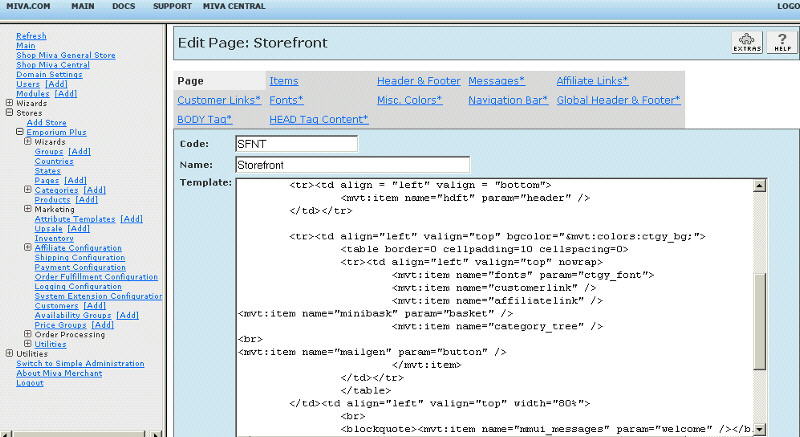
10) Click Pages link to get to the User Interface (fig 4)
11) Click Items link at the top of the User Interface page (fig 5)
12) Click the Add Item button (fig 6)
13) Enter bestsell for the code (fig 8)
14) Look up and scroll to the last page of items and Best Seller Display should be at the end of the list of items
15) Select Best Seller Display
16) Click the Add button to assign the module
17) See the editing requirements below on how to add the Best Seller Display to pages in the store. You can put the table on any page.
Enter data into the applicable input fields.
Hide based on Availability Group
If you have products in availability groups you should use this setting if
you don't want non-eligible customers to view certain product names in the
list.
1) If you select to "Hide", customers must be logged in to view products in
availability groups. Hence, if you have all your products in availability
groups, customers will not see the display until they login.
2) If you do NOT select to "Hide", all customer can view all products but
only eligible logged in customers may link to products in availability
groups. Non-eligible customers will see the name, but it will not be a link.
Table Border Width
Normally this is zero (0), but you may want to accent the table with a border.
Table Width
If you are placing the table in the category column, a setting of about 200
seems to be best.
Table Title
At the top bar of the table you can change the text from Best Sellers to things
like Top Five or Favorite Five.
Title
You can control the background, font color and size with the four settings
related to the title bar cell.
Table
You can control the background, font color and size with the four settings
related to the main table cell(s).
Tight Table
By selecting this option, the product list will be separated with the <BR>
tag instead of separate table cells. This will yield a tighter display.
Number of products to display
Enter a number for the length of the best seller list. A reasonable number
is 3, 4, or 5.
Exclude categories from display
You can exclude specified categories from displaying the Best Seller Display
box. Enter each category code. Terminate each code with the | character.
Put one code on each line with the | at the end of the line.
The module is called within specific template screens with render tokens. They are in the format of
<mvt:item name="itemcode" param="xxxx" />
The templates are listed at the Pages link. You will edit the template by inserting the token and clicking the Update (fig 7). Important: After adding the render token to a template page, you must click the Items link for that page, scroll down to the item name and assign it to the page (fig 8). These two steps are repeated for every page that a module's render token is used on.
This module has two default tokens available
<mvt:item name="bestsell" param="vertical" />
and
<mvt:item name="bestsell" param="horizontal" /> .
The parameter is self explanatory; the table layout is oriented based on the parameter.
Scroll through the page template list and decide which screens you want to show the Best Seller Display on. Screens sfnt, prod, and ctgy are primary screens you would expect to find the display on.
The module also has a custom render token. If you want full template control and are experienced at editing the templates, use the token
<mvt:item name="bestsell" param="custom" /> .
When using this token you will need to include template code. The 3 column example will get you started and provide info on how to use the best seller array. Note, the example contains the custom render token. You would copy and paste this whole example into your page where you want the best seller list to display.