Copyright © 2001, William Weiland
Easily offer a discount based on the number of items in the basket. The store owner configures the trigger levels (number needed to activate the discount) and the corresponding fixed amount off. The store owner can designate 1 - 4 trigger levels so that he/she can vary the discount based on the number bought. The store owner then includes a list of category codes that will be used in the calculation. The discount amount will appear during checkout on the screen after the customer has entered their shipping method.
Install catdis_q.mvc
1) In admin, click Add Modules link (fig 2)
2) Click the file upload button
3) Browse to find the catdis_q.mvc file on your hard drive and upload (fig 3)
4) Click Add to add it to the domain
5) Then in admin click on the plus to the left of Stores
6) Click the plus to the left of your store name
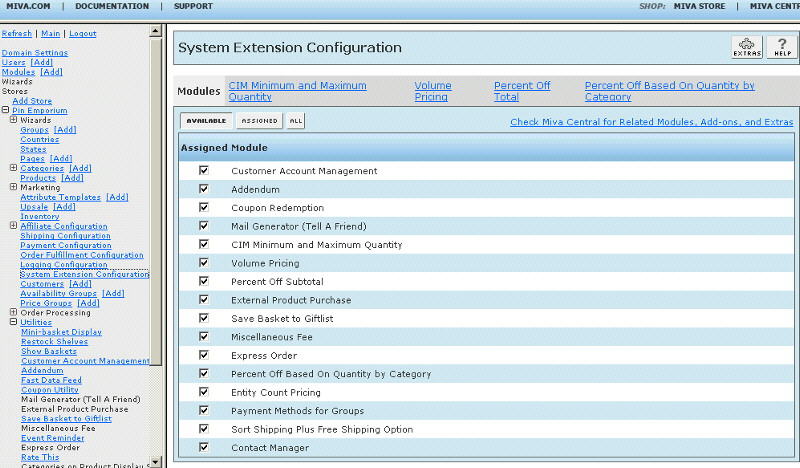
7) Click on System Extension Configuration link (fig 4)
8) Check the box next to the Discount Based On Quantity by Category
9) Click Update
10) The CIM Activity Log (cim_log.mvc) may already be in your store as it is used by many of our modules. Check under the Modules link to see if it is already there. If it is there, skip to 19. If not, then go to 11.
Install cim_log.mvc
11) Again, click Add Modules link
12) Click the file upload button
13) Browse to find the cim_log.mvc file on your hard drive and upload
14) Click Add to add it to the domain
15) Click on the Logging Configuration Link
16) Check the box next to the CIM Activity Log
17) Click Update
18) Skip to 24
Update cim_log.mvc
19) Click Modules link
20) Scroll down to CIM Activity Log and click the link
21) Click the file upload button
22) Browse to find the cim_log.mvc file on your hard drive and upload
23) Click Update to update the module
Configure the module
24) Return to the System Extension Configuration screen (fig 4) and click the link for Discount Based on Quantity by Category to enter the configuration settings
Input data as applicable. Note: at least one category code is required.