Copyright © 1999, William Weiland
These modules record customer order status and interfaces with the Merchant customer management functions.
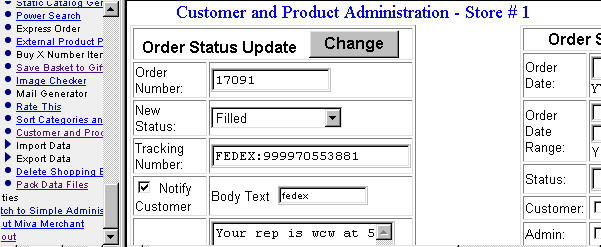
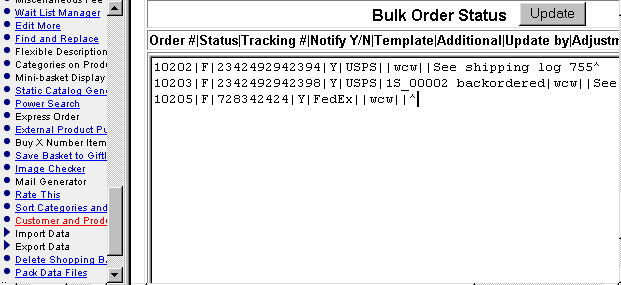
You can change the status of the order and even notify the purchaser of the change with variable styles of update status emails. The status change notice can also include the tracking number if applicable.
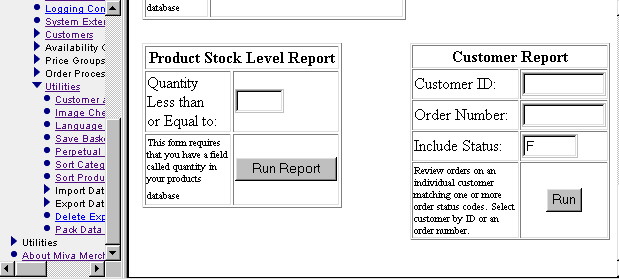
You can run a report for all dates, a range of dates, or a specific date displaying all records or just the records with a specific status, eg Backordered.
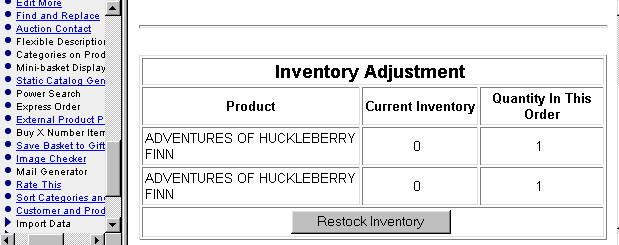
There is also a form which allows you to re-establish inventory levels if you are using the Merchant inventory control system. While the inventory control system will automatically deduct the ordered quantity, it will not replace the quantity if the order is cancelled. Hence, this form was provided to do that. It can also be used to set the inventory level even if not related to an order as it uses the product code to locate the record.
The imcust.zip contains customer.mvc, custadm.mvt, ordstat.htm, and prodquan.mvc.
1) In admin, click Add Modules link (fig 2)
2) Click the file upload button
3) Browse to find the customer.mvc file on your hard drive and upload (fig 3)
4) Click Add to add it to the domain
5) Then in admin click on the plus to the left of Stores
6) Click the plus to the left of your store name
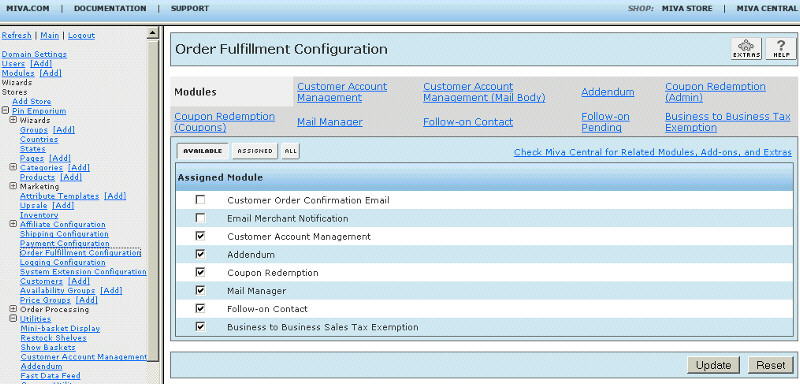
7) Click on Order Fulfillment Configuration link (fig 9)
8) Check the box next to the Customer Account Management
9) Click Update
10) Click on System Extension Configuration link
11) Check the box next to the Customer Account Management
12) Click Update
13) Click on the word Utilities
14) Check the box next to the Customer Account Management
15) Click Update
16) Click Pages link to get to the User Interface (fig 4)
17) Click Items link at the top of the User Interface page (fig 5)
18) Click the Add Item button (fig 6)
19) Enter custadm for the code
20) Look up and scroll to the last page of items and Customer Account Management should be at the end of the list of items
21) Select Customer Account Management (fig 8)
22) Click the Add button to assign the customer module
23) Again, click Pages link to the User Interface (fig 4)
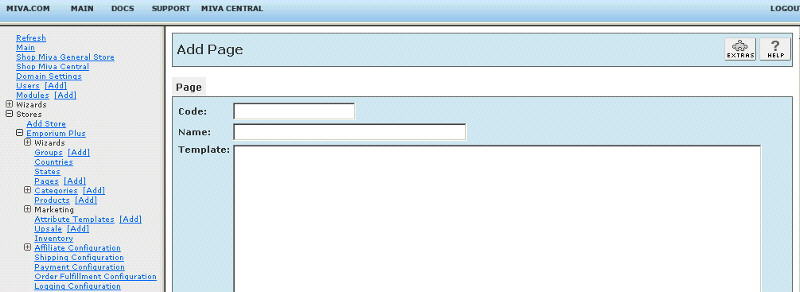
24) Click the Add Page button
25) Enter the page Code as ACCT (fig 7)
26) Enter the page Name as Customer Orders
27) To get started, copy the contents of custadm.mvt to the clipboard and paste it into the page Template input and click the Add button. Note: this is a complete page with several lines. If your text editor opens it as an html file, you will need to view source in order to copy the contents to the clipboard.
28) Click on the Items link at the top and assign the following items to the page and update; head, hdft, navbar, custadm
29) Rename the ordstat.htm file to match your store's ID number. Most would be renamed to s01_ordstat.htm. However, if your store is a second store in the same merchant.mvc mall, then it might be s02_ordstat.htm or even a higher number.
30) FTP the sXX_ordstat.htm file to modules/fulfill/sXX_ordstat.htm (number replacing the XX). If you want to use different abbreviations you can edit this file. In the admin:storename:order fulfillment:Customer Account Management admin screen you can change the List of Status Codes and the Initial Order Status that is assigned.
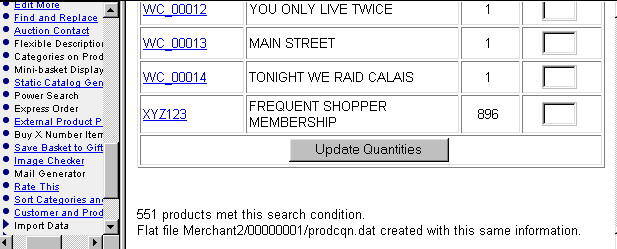
31) If you want to install the optional product quantity import module (prodquan.mvc), see prodquan.htm for installation notes.
Click on the Customer Account Management tab in the Order Fulfillment Configuration screen
From - Enter the from address of your store for order status emails
Subject - Enter the subject for order status emails
Header - Enter beginning line of all order status emails, irregardless of the rest of the email body template
Default message - When sending an order status email, you will enter a body text template. This is the default (most common) template your store will use and saves a step of having to enter it when updating status, since it is already filled in.
Allow re-order - If checked, customers will be able to re-order from the invoice which is displayed from the order history
Configurable options for the re-order table - modify per your needs
Configurable options for the order history table - modify per your needs
Display History location - for the prompt
Orders not found message - when a customer searches for their history but they have no orders placed when they were logged in
List of Status Codes - list the status descriptions separated with the | character. No two status descriptions can begin with the same letter as the only text stored in the record is the first letter of the description
Initial Order Status - when a new order is placed, this is the code that is initially inserted in the record
Carrier Tracking Links - Enter the URL links for the carriers your store is using. You will need to get that link from your carrier. Follow the module's onscreen example to enter your new links. This input needs to be filled for your carriers if you want order tracking clickable links in the order history. Then when updating a specific order status fill in the carrier and tracking number as you see in figure 11 below.
Auto Price Group Inclusion - You can automatically include customers into price groups based on their cumulative order totals. You will use tokens to trigger the totals check and assignment. A good place to put the tokens would be on the customer edit account screen and/or the welcome screen.
Customer Viewed Order History - when checked, the module will use the template you have entered in the inputs below it. If not checked, the module will use the default. New users will probably use the default until they get time to customize a template. A sample template is provided. If you want order tracking links in the order history, you will need to use the template. See the sample template note about which token to use for that tracking link vs just a tracking number.
The order history has a clickable link to display the invoice. If you have code in your invoice (invc page template) that has items you do not want to occur (e.g. affiliate credits) when someone looks up their invoice from the history, you will need to write conditional code around that item in the invc page template so it only runs when the Action is equal to AUTH. As example:
<mvt:if expr="g.Action EQ 'AUTH'">
do code that should only run when action is AUTH
</mvt:if>
This is not an issue with the normal built-in affiliate crediting or properly written fulfillment modules since they follow the Miva Merchant API and only credit in the AUTH function and fulfillment processing function; not with display of the invoice screen.
Click on the Customer Account Management (Mail Body) tab in the Order Fulfillment Configuration screen
You can create as many templates for the order status emails that you want. I have provided an example of how to lay out the text email. You can use the tokens listed under "Available tokens" in the mail body admin screen.
The module is called within specific template screens with render tokens. They are in the format of
<mvt:item name="itemcode" param="xxxx" />
The templates are listed at the Pages link. You will edit the template by inserting the token and clicking the Update (fig 7). Important: After adding the render token to a template page, you must click the Items link for that page, scroll down to the item name and assign it to the page (fig 8). These two steps are repeated for every page that a module's render token is used on.
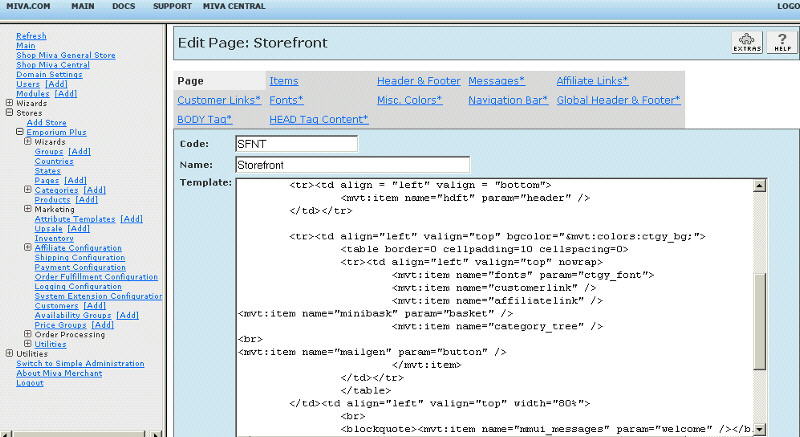
1) On page 'aced' (customer edit), insert <mvt:item name="custadm" param="history_prompt" /> on the page bottom.
2) On page 'sfnt' (storefront), insert <mvt:item name="custadm" param="history_link" /> where you want the order history link to display. If you want the raw link it is <a href="&mvte:global:secure_sessionurl;Screen=ACCT&Action=DISP&Order=0&Store_Code=&mvta:global:store_code;">History</a>
3) On page 'invc' (invoice), insert <mvt:item name="custadm" param="reorder" /> at the bottom of the page.
4) On page 'logn' (logon), insert <mvt:item name="custadm" param="invc" /> just above the closing </form> tag.
5) Account creation - If customers are allowed to order without creating an account, those customers will not be able to view their order history. If you want to ensure all customers can view order history, then you will need to eliminate the link to place order without account in the ordl page template.
You can automatically add customers to price groups by putting tokens in specific locations. For example, below is an example of tokens on the customer edit page after a customer logs in. The latest version of Merchant 5 takes the customer to the customer edit page when logging in.
<mvt:if expr="g.Action AND g.Action EQ 'LOGN'">
<mvt:item name="custadm" param="total-FD" />
<mvt:item name="custadm" param="~50" />
<mvt:if expr="g.CIM_Customer_Total_Orders GT 50">
<b>Price Group:
<mvt:item name="custadm" param="show_group" />
</b>
<br><br>
Total: <mvt:item name="custadm" param="show_total_f" />
<br><br>
</mvt:if>
</mvt:if>
This example will sum all of this customer's past orders which have a status of F (filled) or D (done) using the first token. Then the 2nd module token will run the automatic price group inclusion if the sum of the orders total exceeds $50. If they are assigned to a price group, that price group name will then be displayed using the 3rd token. Finally, the 4th token will display the formatted total of orders with the F or D status.
Beginning with module version 5.0260 we added a new subtotal token which would replace the total- token. For example:
<mvt:item name="custadm" param="subtotal-FD" />
will calculate the dollar amount of the orders (status F or D) less the shipping and tax charges.
In the module's admin, you establish the price group names and the level they kick in. As example, you might have it set like:
Wholesale preferred|2000^
Wholesale standard|500^
Frequent shopper|125^
This shows:
Price Group Name|order history level^
The highest amount must be on the top line.
You can put a form anywhere in the store that will let a customer lookup their order by entering their order number and the email address that matches it. The customer does not need to have an account and they do not need to be logged in.
<P>
<P>
<table border="0">
<tr>
<th colspan="2">Previous Order Lookup
</th>
</tr> <form method="POST" action="http://www.YOURDOMAIN.com/mm5/merchant.mvc?">
<input type="hidden" name="Screen" value="ACCT">
<input type="hidden" name="Action" value="SOLU">
<input type="hidden" name="Store_Code" value="YOURSTORECODE">
<tr>
<td>Order Number:
</td>
<td>
<input type="text" name="myorder" value="">
</td>
</tr>
<tr>
<td>Order Email.:
</td>
<td>
<input type="text" name="myemail" value="">
</td>
</tr>
<tr>
<td colspan="2">
<input type="submit" name="trash" value="Look Up">
</td>
</tr>
</table>
</form>
<br>
<a href="https://www.YOURDOMAIN.com/mm5/merchant.mvc?Screen=LOGN&Order=0&Store_Code=YOURSTORECODE">
Login</a> for complete history.
Click on the image to the LEFT of the admin:stores:utilities link. Scroll down to Customer Account Management.
There are several runtime report forms (fig 11-15) displayed on the screen. The forms should be self explanatory.