Copyright © 2006, William Weiland
This interface module will display and retrieve customer entered information relative to customer accounts on the account create, account edit, and order customer information screens. It works with the custom fields module (CFM) that comes with MIVA Merchant, so be sure to install the CFM first under admin:store:utilities. Create your custom customer fields in the CFM module. This must be done before you will be able to access and update the custom fields on the customer screens.
Install custedit.mvc
1) In admin, click Add Modules link (fig 2)
2) Click the file upload button
3) Browse to find the custedit.mvc file on your hard drive and upload (fig 3)
4) Click Add to add it to the domain
5) Then in admin click on the plus to the left of Stores
6) Click the plus to the left of your store name
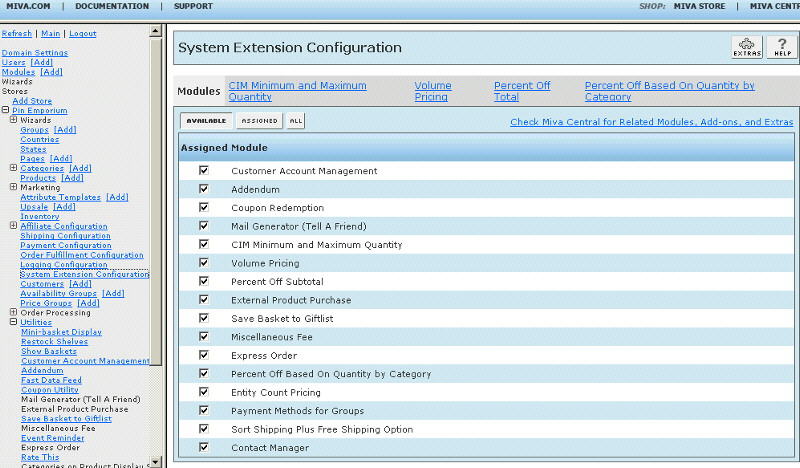
7) Click on System Extension Configuration link (fig 9)
8) Check the box next to the Custom Customer Fields Interface
9) Click Update
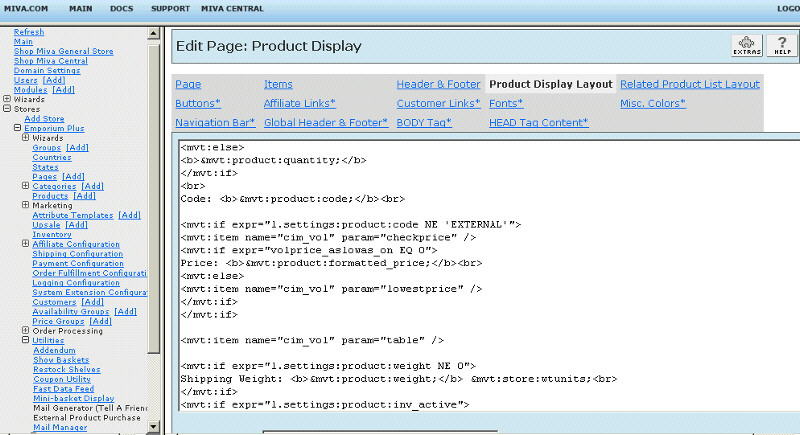
10) Click Pages link to get to the User Interface (fig 4)
11) Click Items link at the top of the User Interface page (fig 5)
12) Click the Add Item button (fig 6)
13) Enter custedit for the code (fig 8)
14) Look up and scroll to the last page of items and Custom Customer Fields Interface should be at the end of the list of items
15) Select Custom Customer Fields Interface
16) Click the Add button to assign the module
17) The CIM Activity Log (cim_log.mvc) may already be in your store as it is used by many of our modules. Check under the Modules link to see if it is already there. If it is there, skip to 26. If not, then go to 18.
Install cim_log.mvc
18) Again, click Add Modules link
19) Click the file upload button
20) Browse to find the cim_log.mvc file on your hard drive and upload
21) Click Add to add it to the domain
22) Click on the Logging Configuration Link
23) Check the box next to the CIM Activity Log
24) Click Update
25) Skip to 31
Update cim_log.mvc
26) Click Modules link
27) Scroll down to CIM Activity Log and click the link
28) Click the file upload button
29) Browse to find the cim_log.mvc file on your hard drive and upload
30) Click Update to update the module
31) Follow the instructions under Editing Requirements
Create a New Customer Field: Go to Utilities, select Custom Customer Fields, add a new field. The code will be what you put in the token's param field. You can make as many as you like, just remember they must have unique Codes.
Edit the Templates Pages: Next, you will need to edit the page templates where customer information is collected if you want the custom fields to display. The module can be linked within specific template screens with render tokens. They are in the format of:
<mvt:item name="custedit" param="xxxx" />
The templates are listed at the Pages link. You will edit the template by inserting the token and related code and then clicking the Update (fig 7).
Assign Item to Template: After adding the code to a template page, you must click the Items link for that page, scroll down to the item name and assign it to the page (fig 8).
IMPORTANT: These two steps must be repeated for every page that a module's render token is used on.
You can either use the foreach example which will display all of the custom fields together or you can have a separate entry for each custom field. Below are examples:
Example of a custom customer field (membership) as a text input:
<!-- token -->
<mvt:item name="custedit" param="membership" />
<!-- code -->
<tr><td align="left" valign="middle">
<mvt:item name="fonts" param="body_font">
<i>
&mvt:custedit:current:name;
</i>
</mvt:item>
</td><td align="left" valign="middle">
<mvt:item name="fonts" param="body_font">
<input type="text" size="40" name="CFM_value[&mvte:custedit:current:id;]" value="&mvte:custedit:current:value;">
<input type="hidden" name="CFM_field[&mvte:custedit:current:id;]" value="1">
</mvt:item>
</td></tr>
Example of custom customer field (newsletter) as a checkbox:
<!-- token -->
<mvt:item name="custedit" param="newsletter" />
<!-- code -->
<tr><td align="left" valign="middle" colspan="2">
<mvt:item name="fonts" param="body_font">
<mvt:if expr="l.settings:custedit:current:value EQ 1">
<input type="checkbox" name="CFM_value[&mvte:custedit:current:id;]" value="1" checked>
<mvt:else>
<input type="checkbox" name="CFM_value[&mvte:custedit:current:id;]" value="1">
</mvt:if>
<input type="hidden" name="CFM_field[&mvte:custedit:current:id;]" value="1">
<i>
&mvt:custedit:current:name;
</i>
</mvt:item>
</td></tr>
Simple display of all custom customer fields:
<!-- code (token not required) -->
<mvt:foreach iterator="customfield" array="customer:customfields">
<tr><td align="left" valign="middle">
<mvt:item name="fonts" param="body_font">
<i>
&mvt:customfield:name;
</i>
</mvt:item>
</td><td align="left" valign="middle">
<mvt:item name="fonts" param="body_font">
<input type="text" size="40" name="CFM_value[&mvte:customfield:id;]" value="&mvt:customfield:value;">
</mvt:item>
</td></tr>
<input type="hidden" name="CFM_field[&mvte:customfield:id;]" value="1">
</mvt:foreach>
Example of displaying the information gathered on a page
<!-- token -->
<mvt:item name="custedit" param="membership" />
<!-- code -->
&mvte:custedit:current:value;
e-mail tokens if using the Mail Manager legacy template
<!-- token -->
%custom:membership%
You can make the input required if you have version 5.007 of the module or newer. If you want to make an input required there are a couple extra things you do. First you will want to change the label color to red if it is left blank.
<mvt:if expr="g.error_messages AND ISNULL l.settings:custedit:current:value">
<font color="red">
&mvt:custedit:current:name;
</font>
<mvt:else>
&mvt:custedit:current:name;
</mvt:if>
Next, you will need this hidden input right after the above 7 lines.
<input type="hidden" name="CFM_required[&mvte:custedit:current:id;]" value="1">
Select the method of displaying the fields from the examples above and insert the code on the following pages: acad, aced, and ocst. If you allow your customers to checkout without creating an account, see the limitation below for wrapping the custom fields with a conditional check on the ocst page. Don't forget to assign the custedit item to each of the three pages' items list.
1) Custom customer fields are used for customer records. If the customer does not create or have an existing account, there is no place to save or use the information. Hence, on the 'OCST' checkout screen, it is best to wrap the custom customer field inputs within a conditional check for customer ID.
<mvt:if expr="basket:cust_id GT 0">
....custom field input....
</mvt:if>
2) If you want to display the custom customer fields in the notification emails, you will need to use an email module capable of using the module's tokens.
3) The inputs will disable html and strip out several of the SQL injection hacks. It is expected customers will be entering text or checkbox entries. While textarea inputs can be used, internal actions will be taken to reduce hacker attempts. So if you need custom fields that will accept html, this module is not for you.
4) Currently the fields are limited to 254 characters in length.