Copyright © 2008, William Weiland
This module is no longer needed as its features have been incorporated into the core Miva Merchant. Go to the admin > system extension settings. Click the link. On the right, uncheck the box next to the Email Login module and click the update button. Then under admin > global settings > modules, locate emaillog on the right. Delete the module from the server. In order to incorporate the new email login and password recovery features, you should edit your page templates. Miva has provided a "how to" in the reference guide. See Appendix I: Template changes for PR8 Update 7 page 405. It should only take you a few minutes to make those changes and will improve the customer experience.
Overview
The default login for Miva Merchant prompts the customer for their username login ID. Customers frequently forget that ID and end up creating a new account. This module has two features:
1) Accept the user's email address in lieu of his/her login ID on the login screen
2) Display the login ID when a correct email address is entered in a username lookup form on any page or popup
1) In admin, click Add Modules link (fig 2)
2) Click the file upload button
3) Browse to find the emaillog.mvc file on your hard drive and upload (fig 3)
4) Click Add to add it to the domain
5) Then in admin click on the plus to the left of Stores
6) Click the plus to the left of your store name
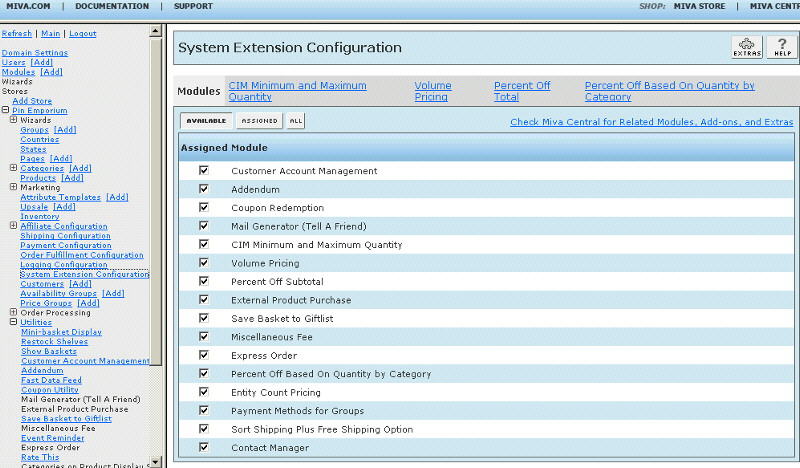
7) Click on the System Extension Configuration link (fig 4)
8) Check the box next to Email Address Login
9) Click Update
1) In order to change the prompt for the email address on the login screens, you will make changes to the LOGN and ORDL page templates. Locate the line that contains:
Login Name:
Add the following two lines right after it.
<br />
OR Email:
A few lines below that replace
<input type="text" size="40" name="Customer_Login" value="&mvte:global:Customer_Login;">
with
<mvt:if expr="('Invalid Password' CIN g.Error_Messages) AND g.Customer_Email_Login">
<input type="text" size="40" name="Customer_Login" value="&mvte:global:Customer_Email_Login;">
<mvt:else>
<input type="text" size="40" name="Customer_Login" value="&mvte:global:Customer_Login;">
</mvt:if>
2) If you want to have a username lookup form separate from the login page, you can do that too. In the form below the only thing you have to change is the hidden input value for Screen. Make that value the name of the Screen you are putting this form on.
<mvt:if expr="g.Customer_Login">
Your UserName Login: &mvte:global:Customer_Login;
</mvt:if>
<mvt:if expr="g.Error_Messages">
<font color="red">
&mvte:global:Error_Messages;
</font>
</mvt:if>
<form method="post" action="&mvt:global:secure_sessionurl;">
<input type="hidden" name="Store_Code" value="&mvte:global:store:code;">
<input type="hidden" name="Screen" value="LOOKUP">
<input type="hidden" name="Action" value="ELOOK">
Your Email Address: <input type="text" size="40" name="Customer_Email_Login" value="&mvte:global:Customer_Email_Login;">
<br />
<input type="submit" name="trash" value="Retrieve Login">
</form>
You can add an email feature to this form. If you want to send the login in an email, put these two hidden inputs inside the form. You are allowed up to 30 characters for the subject. You must include the %customer_login% token in the email_message input. You cannot use html in these two inputs.
<input type="hidden" name="email_subject" value="Your login ID">
<input type="hidden" name="email_message" value="Your username login is %customer_login%.">
You can also include a feedback message to tell the customer that the email was sent by including the following on the same page template.
<mvt:if expr="g.email_sent">
<br />Your login has been sent to &mvte:global:email_sent;
</mvt:if>
If you send the login in an email, you probably do not want to display it above the form. So the first three lines
<mvt:if expr="g.Customer_Login">
Your UserName Login: &mvte:global:Customer_Login;
</mvt:if>
don't need to be used.
3) You can use the same technique as #2 and put it in a popup. Create a new page in admin > store > pages. Put the code from #2 in that page. Then on the page where you want the popup to be called from, simply use standard javascript code for running that popup.