Copyright © 2006, William Weiland
Create a flat file of your products which can be used to populate external databases, e.g. Froogle, Yahoo, Shopzilla, and others.
You will install one module (exprodf.mvc).
Install exprodf.mvc
1) In admin, click Add Modules link (fig 2)
2) Click the file upload button
3) Browse to find the exprodf.mvc file on your hard drive and upload (fig 3)
4) Click Add to add it to the domain
5) Then in admin click on the plus to the left of Stores
6) Click the plus to the left of your store name
7) Click on the word Utilities under your store (fig 4)
8) Check the box next to the Template Data Feed
9) Click Update
10) Click on System Extension Settings link
11) Check the box next to the Template Data Feed if it is not already checked
12) Click Update
13) In the Utility settings/configuration screen you will see the Template Data Feed module as a link on the right side of the screen. Click it and enter the order number and where you purchased the license from. Beginning with version 5.047 of the module you will also need to supply a license key. This is not the license key you may have received when you purchased the license, as some vendors have their own license system. This license key is obtained directly from Emporium Plus. If you purchased from Emporium Plus, the key may have been included in the delivery email. If you purchased from other than the Emporium Plus store or it was not in the Emporium Plus delivery email, you can get it by clicking the link to "Request License Key" in the module's admin screen. 1) enter your order number and where you got it, 2) click Update, 3) request the key. Make sure the order number, domain, and store code are correctly inserted in the request form and the order number is in the subject. The license key is based on these three elements. If you provided that info, the key will be sent back to you. After entering the key and saving, the module will be available for use in your store past the initial 10 days.
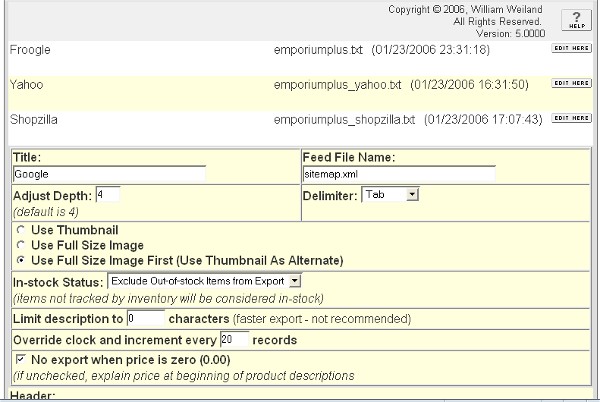
14) Click the link at the top of the screen for Template Data Feed to enter the configuration settings (fig 5). The examples need a minor modification and then should be ready to run. Change the "yourdomain.com" to your actual domain.
1) In admin, click on Stores
2) Click the image to the left of your store name
3) Click the image to the left of Utilities under your store
4) Click the link to the Template Data Feed
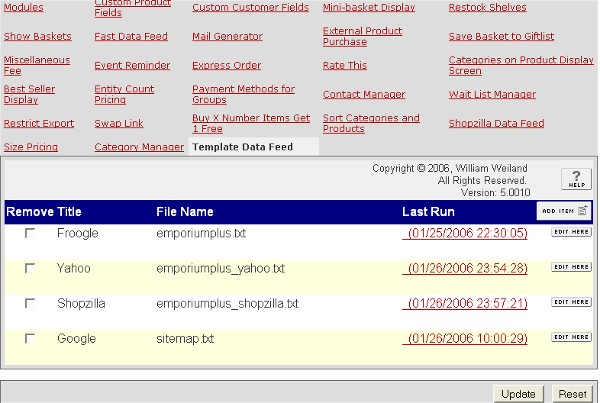
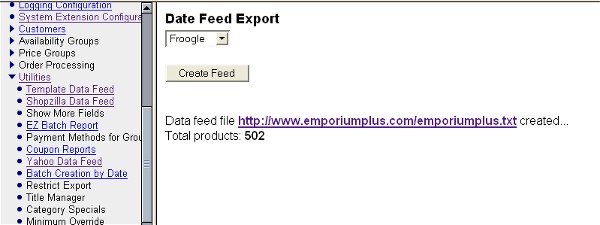
5) Select the feed to export
5) Click on the data exporting button
6) If successful, the file path will appear as a link
The module will attempt to resolve images for your thumbnails. If you use the full path url for images in your store, it will use them. If you use a virtual path below your Merchant2/ directory it will add the root directory for graphics that is defined in your admin domain settings. If you preceed the image urls with ../ it will replace the ../ with the domain root determined from your server root.
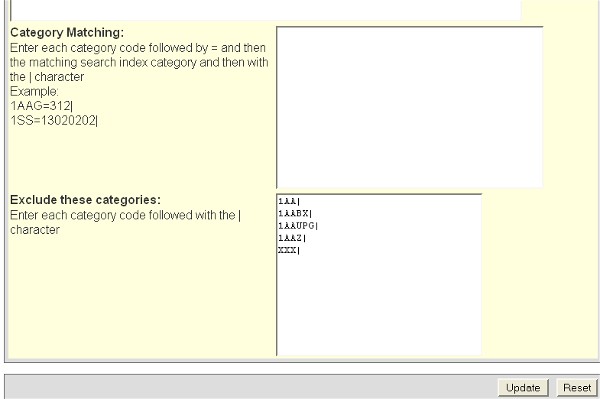
It will export all products unless they are in a category which you have excluded AND they are in no other non-excluded category. You can also exclude uncategorized products by excluding a blank category code. So a string of excluded codes could be ABC|XYZ||CDE. This will exclude products in ABC, XYZ, CDE and all products that have no category.
Inactive and deleted products will not be exported. Products with zero quantity can be exported. The presumption being that if they are exported they will be searchable in indexes. Once the customer reaches your store, it is up to your policy to decide what to tell them. This way, products will not be missed by search engines just because they are out of stock the day the export is run. Some search indexes do not want you to include out-of-stock products.
You can exclude products from export by listing them in the admin input for excluding products. Conversely, you can include only specific products by putting the + character at the beginning of the list of product codes.
ABC|
DEF|
XYZ|
would export all products except these three.
+ABC|
DEF|
XYZ|
would export only these three products.
You can limit the products by category by listing the category codes to exclude from product export. As with the product exclude/include above, if you put a + character at the beginning of the list, only products that are in those categories will be exported. Keep in mind, if a product is in multiple categories, it could be exported even if you exclude one of the categories it is in. You would have to exclude all the categories it is in before it would be blocked from export.
You can specify a price range and/or weight range of products to export. If you leave these entries as 0.00, that feature will be skipped.
Products will be included in the datafeed even if they are in availability groups and are supposed to be restricted viewing unless you check the box to block their export.
If you are having issues and the export is freezing at a certain point, you can write an error log file. It will be put in the data directory called export with the name templatedatafeed_error.log. In order to generate that file you need to put 9999 in the input that says "Limit description to [ ] characters". Then run the export.
You may find the affiliate code generation useful, even if the file is not going to an affiliate. By creating a dummy affiliate account, you can track where sales are coming from by checking the affiliate commissions.
Be sure the file name that you choose for the export is a valid file name (ie letters, numbers, underline and hyphen - no spaces).
Additional fields. Many search indexes have additional optional fields which you may want to include in the export. Those fields are not among the standard fields which are in MIVA Merchant. However, you can use the built in MIVA Merchant Custom Product Fields module to provide the data. You will need to assign the custom field module under the store utilities. Then in each product record you can assign values to those fields. Below is a list of fields which Shopzilla will import. The fields, marked with an asterisk, are the additional fields which you can include data if you have assigned values in the product records for those custom fields.
Category
*Mfr
Title
Description
LINK
Image
Stock
*Condition
Ship Weight
*Ship Cost
*Bid
*Promo Des.
*Other
Price
Fortunately, you do not need to call your custom fields the same names as Shopzilla uses. You may have other exports which would name them slightly different. So in the export module you can map your custom fields to match the six optional fields that Shopzilla can use. In the export you will have tokens like %custom:condition%. When the export is run, if the product has "condition" defined, it will fill in a value. If not, it will insert a space so the column will still be there. This example is for Shopzilla; other search indexes may have different custom field needs.
After running the export, the link will appear in the admin window. That link uses another window to display your text file results. When you go to that other window, be sure you refresh/reload the screen as the previous export may still be in the cache. Save that file to your PC and then upload per the search provider's instructions.
| %^% | delimiter | header, product, category, footer |
| %lf% | line feed | header, product, category, footer |
| %wlf% | windows carriage return for end of line when needed | header, product, category, footer |
| %e-&% | & (entity encoded) | header, product, category, footer |
| %store:code% | store code | product, category |
| %category:code% | category code | product, category |
| %category:name% | category name | product, category |
| %r-category:name% | category name (with html) | product, category |
| %category:all% | all category codes product is assigned to v5.070 or newer | product |
| %category:xxx% | all category codes product is assigned to v5.070 or newer, includes error cats (see FAQ) | product |
| %parentcat:code% | parent category code of current category v5.070 or newer | category |
| %parentcat:name% | parent category name of current category v5.070 or newer | category |
| %meta:keywords% | meta tag keywords | product, category |
| %meta:descrip% | meta tag description | product, category |
| %category:match% | search index category match | product |
| %category:names% | category breadcrumb | product |
| %primarycat:name% | category name from custom field primarycat v5.0580 and newer | product |
| %primarycat:code% | category code from custom field primarycat v5.0580 and newer | product |
| %product:name% | product name | product |
| %a-product:name% | product name (attribute encoded) | product |
| %r-product:name% | product name (with html) | product |
| %h-product:name% | product name (hyphen for spaces, alphanumeric characters only) - version 5.036 and newer | product |
| %hyp-product:name% | product name (hyphen for spaces and alphanumeric characters) - version 5.036 and newer | product |
| %product:code% | product code | product |
| %product:cancat_id% | canonical id - version 5.080 or newer | product |
| %product:cancat_code% | canonical code - version 5.080 or newer | product |
| %product:cancat_name% | canonical name - version 5.080 or newer | product |
| %product:page_id% | alternate page id - version 5.080 or newer | product |
| %product:page_code% | alternate page code - version 5.080 or newer | product |
| %product:page_name% | alternate page name - version 5.080 or newer | product |
| %product:sku% | product sku | product |
| %product:catcount% | number categories product is in, v5.070 | product |
| %product:price% | product price | product |
| %product:priceconvert:X.XX% | product price converted for other currency - version 5.041 or newer | product |
| %product:cost% | product cost | product |
| %product:descrip% | product description | product |
| %r-product:descrip% | product description (with html) | product |
| %product:image% | product image (thumbnail or full - auto selects if primary is missing) | product |
| %product:thumbnail% | product thumbnail | product |
| %product:fullsize% | product image | product |
| %product:weight% | product weight | product |
| %product:quantity% | product quantity when using MIVA's built in inventory system | product |
| %product:id% | product internal id number | product |
| %product:active% | product active status 1/0 | product |
| %product:disp_order% | product display order | product |
| %product:rating% | rating if use Tool Kit RR system | product |
| %product:raters% | number who rated if use Tool Kit RR system | product |
| %options:attributecode% |
list of option prompts for this attribute v5.056 or newer (see FAQ below) |
product |
| %optionscode:attributecode% |
list of option codes for this attribute v5.056 or newer (see FAQ below) |
product |
| %sold:20120101:20120731:0-4% |
MySQL only, quantity sold between two dates, display only those between the range listed
v5.081 or newer (see FAQ below) |
product |
| %product:url% | product url | product |
| %e-product:url% | product url (entity encoded) | product |
| %product2:????% | added product field in the products database (altered structure), replace ???? with the field name | product |
| %custom:????% | custom product field (Merchant's built-in custom fields module), replace ???? with the field code | product |
| %h-custom:????% | custom product field (Merchant's built-in custom fields module), replace ???? with the field code, (hyphen for spaces, alphanumeric characters only) - version 5.083 and newer | product |
| %hyp-custom:????% | custom product field (Merchant's built-in custom fields module), replace ???? with the field code, (hyphen for spaces and alphanumeric characters) - version 5.083 and newer | product |
| %vcustom:????% | custom product (variant) field (Merchant's built-in custom fields module), replace ???? with the field code | product |
| %h-vcustom:????% | custom product (variant) field (Merchant's built-in custom fields module), replace ???? with the field code, (hyphen for spaces, alphanumeric characters only) - version 5.083 and newer | product |
| %hyp-vcustom:????% | custom product (variant) field (Merchant's built-in custom fields module), replace ???? with the field code, (hyphen for spaces and alphanumeric characters) - version 5.083 and newer | product |
| %custom_required:????% | custom product field (Merchant's built-in custom fields module), replace ???? with the field code, if blank the product record will not be exported, TDF version 5.0790 or newer | product |
| %vcustom_required:????% | custom product (variant) field (Merchant's built-in custom fields module), replace ???? with the field code, if blank the product record will not be exported, TDF version 5.0790 or newer | product |
| %h-product:name% | product name (hyphen for spaces, alphanumeric characters only) - version 5.036 and newer | product |
| %hyp-product:name% | product name (hyphen for spaces and alphanumeric characters) - version 5.036 and newer | product |
| %product:shipping_width% | shipping size width, TDF version 5.0920 or newer | product |
| %product:shipping_length% | shipping size length, TDF version 5.0920 or newer | product |
| %product:shipping_height% | shipping size height, TDF version 5.0920 or newer | product |
| %list_categories% | insert the category input loop into another section | header, footer |
| %a-category:name% | category name (attribute encoded) | category |
| %e-category:name% | category name (entity encoded) | category |
| %category:header% | category header | category |
| %e-category:header% | category header (entity encoded) | category |
| %category:footer% | category footer | category |
| %e-category:footer% | category footer (entity encoded) | category |
| %category:url% | category url | category |
| %e-category:url% | category url (entity encoded) | category |
| %category:disp_order% | category display order | category |
| %customcategory:????% | custom category field, replace ???? with the field code, TDF version 5.0860 or newer | category |
| %year:XX% | YYYY expires XX days from now, e.g. 30 | header, product, category |
| %month:XX% | MM (01-12) expires XX days from now, e.g. 30 | header, product, category |
| %cmonth:XX% | Month (Jan-Dec) expires XX days from now, e.g. 30 | header, product, category |
| %day:XX% | DD (01-31) expires XX days from now, e.g. 30 | header, product, category |
| %dow:XX% | Day of week (Sun-Sat) expires XX days from now, e.g. 30 | header, product, category |
| %time% | Current GMT time as HH:MM:SS | header, product, category |
| %newest% | Sort newest products first instead of alphabetical by name | header |
| %limit:XXXX% | Export only XXXX (1-9999) products, e.g. 20 | header |
| %parse:name% | Export the words in the product names - see FAQ | product |
| %parse:descrip% | Export the words in the product descriptions - see FAQ | product |
| %parsecustom:????% | Export the words in the product custom field ???? - see FAQ | product |
|
%lastupdate:date:yyyy% %lastupdate:date:yy% %lastupdate:date:m% %lastupdate:date:mm% %lastupdate:date:d% %lastupdate:date:dd% %lastupdate:date:dow% %lastupdate:time:h% %lastupdate:time:hh% %lastupdate:time:m% %lastupdate:time:mm% %lastupdate:time:ss% %lastupdate:date:month% %lastupdate:date:day% | Insert and read last update date/time | product, category |
| The functions below require TDF v5.0660 and Miva PR8 or newer | ||
| %item_group_id% | Master product code, causes attribute inventory variant products if applicable | product |
| %master:code% | Master product code (same as item_group_id) | product |
| %master:name% | Master product name | product |
| %a-master:name% | Master product name attribute encoded | product |
| %availability:0:in stock:out of stock% |
2nd param = out of stock level 3rd param = in stock message 4th param = out of stock message |
product |
|
%image:custom%
(see FAQ for extended features in TDF 5.083 or newer) |
1st additional image else full size else thumbnail | product |
|
%image:custom_required%
(see FAQ for extended features in TDF 5.083 or newer) |
1st additional image else full size else thumbnail. If no image, product is not exported. Requires TDF v5.0690 or newer. | product |
| %image:list% | 2-10 additional images in comma separated list | product |
| %imagenumber:??% | Specific image number, e.g. 1 or 2 or 3. Requires TDF v5.0850 or newer. | product |
| %variant:color%, %variant:material%, %variant:pattern%, %variant:size% | variant attribute | product |
Q: I ran the data feed and the screen turns blank after a period of time.
A: There are a couple issues that could cause this. First, try running it with a lower number of products to export with each screen refresh. If it still fails, change the directory depth to 3. If it still does not work, change it to 0.
Q: I inserted the expires tokens and they did not convert to a date.
A: This token was added in module version 5.007. Update your module from the store you originally got it from.
Q: I inserted the newest, limit, time, dow, cmonth tokens and they did not work.
A: These tokens were added in module version 5.024. Update your module from the store you originally got it from.
Q: Google added new fields, do I need to be concerned?
A: With Google you can now have a lot of new fields. Many of these are required fields now. They differ by product type, e.g. books would have a different feed from clothing. Here is an example of the new header line. You will need to adjust it for your product type. The last three columns in this example require that you be using Template Data Feed version 5.066 and Miva Merchant Production Release 8 or newer. The item_group_id token is used only if some of your products use inventory variants, thus requiring a separate line listing for each variant. Google requires that a variant have at least one of these attribute names that differentiate it from others (color, material, pattern, size). If none use these variants, do not use this token as it will slow down the processing. See the Google feed requirements pages.
link%^%title%^%description%^%image_link%^%price%^%id%^%expiration_date%^%brand%^%condition%^%product_type%^% google_product_category%^%weight%^%availability%^%additional_image_link%^%item_group_id%^%color
Change your product field export tokens accordingly. If your products are not all the same for brand, condition, and product type, you may need to use Merchant's built-in custom product fields module to populate those columns. The simpliest idea is to use a constant for the value of brand and condition, eg new. For the product_type column, often the %category:name% token will work ok to describe the product_type. %image:custom% is a new token for Merchant PR8 or newer. It first checks the custom product images and exports the url for the first in the list. If there are none, it will use the full size image url. If that is blank, it will use the thumbnail url. An example of the product section might look like
http://www.yourdomain.com/mm5/merchant.mvc?Screen=PROD&Product_Code=%master:code%&Category_Code=%category:code%&Store_Code=%store:code%%^% %product:name%%^%%product:descrip%%^%%image:custom%%^%%product:price%%^%%product:code%%^%%year:29%-%month:29%-%day:29%%^%%custom:brand%%^%new%^%%category:name%%^% %category:match%%^%%product:weight%%^%%availability:0:in stock:out of stock%%^%%image:list%%^%%item_group_id%%^%%variant:color%
Be sure to change "yourdomain.com" if you choose to use this example. This will suffice for many products. However, if your store contains certain item types, you may need even more custom fields. See the info page at http://www.google.com/support/merchants/bin/answer.py?answer=160161 for more info for specific item types. You may need to add upc, mpn, isbn or other columns using custom field data. See http://www.google.com/support/merchants/bin/answer.py?answer=188494 for more info on the post Sept 22, 2011 requirements.
Q: How do I export multiple lines for a product when that product has variants which change the product?
A: Beginning with Template Data Feed 5.066 and Miva Merchant Production Release 8 you can use the token %item_group_id% in the product line. Note: Google is currently only accepting these attributes as product variants (color, material, pattern, size). So in conjunction with the %item_group_id% you will also use the token for the variant. Those are in the format %variant:color%. This tells the module to stay on the same master product and export a separate line for each variant. So if you have attribute inventory variant products, then use this feature in the header and product lines. If you do not have any attribute inventory variant products, do not use this feature. Naturally, use of the token will increase the processing time required to generate the data feed, so don't use it if not needed.
Q: Can I run the Google Base export late at night without having to log into admin?
A: In many cases, yes. See the article in the MivaMerchant forums at http://extranet.mivamerchant.com/forums/showthread.php?t=14739&highlight=cron. Be sure to cover the whole thread including the post near the end about suppressing the email.
A: If you are using Template Data Feed version 5.0750 or newer you can use cron and run the technique described at this how to doc. This technique overcomes the timeout limitation of the cron method discussed in the first answer.
Q: Why is it only exporting half of the products?
A: Do you use Miva's built in inventory tracking? If not, set it up to include out of stock items.
Q: My custom field data is not showing up in the export.
A: The TDF uses the MIVA supplied, built-in custom fields module. It does not use 3rd party custom fields modules. Make sure you are using the built-in module.
Q: I am using a Mac with Safari browser. My export stopped working in Nov 2007.
A: Apparently an update of the browser resulted in a problem with the javascript that refreshes the screen. Use a different browser to run the export for now. Perhaps Safari will be updated in the future to correct the javascript issue.
Q: I am using chrome browser. My export hangs.
A: Apparently this browser has a problem with the javascript that refreshes the screen. Use a different browser to run the export for now. Perhaps chrome will be updated in the future to correct the javascript issue.
Q: I am trying to export category urls but they are not showing up. I have filled in the category section.
A: Make sure you use the %list_categories% token in either the header or footer section, depending on if you want them at the top or the bottom of the export.
Q: How can I generate a RSS feed that shows the newest products in the store?
A: At this example code page you can see what I used to create a feed which displays the newest 20 products. You will probably also setup the feed so it only exports a couple hundred characters of the description.
Q: My meta tag keywords and description tokens don't seem to be working.
A: Make sure you have Template Data Feed module version 5.038 or newer and are using Merchant 5.5 or newer.
Q: My product:priceconvert token does not seem to work.
A: Make sure your version of the module is 5.041 or newer. Also, in the X.XX portion of the token you can have up to 6 characters including the decimal. So you can have %product:priceconvert:X.XXXX% or %product:priceconvert:.XXXXX% or %product:priceconvert:X.XX%
Q: What are the "parse" tokens used for?
A: Beginning with version 5.043 of this module, you can create word lists of all the words (letter only words) in the product names, descriptions, or any custom product field. The list is exported with one word per line. You can only do one parse field per export. For example, create a feed with the title "Word List of Names" and the file name as "namelist.txt". The the only thing you put in the product section is %parse:name% Save that export template and run the export. One of the uses of the word list is to populate the "did you mean" suggested word feature in our Power Search module.
Q: How do I use the lastupdate token?
A: Make sure the custom fields module is assigned under utilities. Then create a custom field called lastupdate for product, category and customer. When you use the tokens listed in the table above, the module will check for a value in that field. If it is blank, it will insert the current unix time. If it is not blank, it will not change it. Then it will export the data for the tokens you use in the template data feed. If you are using our Emporium Plus Tool Kit, you can also display text like "Updated: Jul 4, 2009 (or whatever) on the product and category screens. The Tool Kit also updates the field when you individually edit and modify a product or category record in admin.
Q: How do I use the primarycat tokens?
A: Beginning with Template Data Feed (TDF) version 5.0580, you can use the primarycat tokens instead of the %category:name% and %category:code% tokens. Sometimes products are in more than one category. When that happens the TDF will export the first category that matches the product. That may not be the category you want to associate with the product. You can create a custom product field with the code "primarycat". Then for each product you want to use a specific category, enter the category code into that field. When the TDF runs it will check that field first. If it is blank or the category no longer exists, it will export the value for these tokens %category:name% and %category:code%. If it has a value and the category exists, it will export that category which you deemed to be the primary category.
Q: Can you explain the token %options:attributecode% and if attribute templates are handled differently than direct assignment of attributes to products??
A: Beginning with version 5.056 of the Template Data Feed, you can export attribute options.
The second part of the token is "attributecode". That is different depending on if you are assigning attributes directly to products or if you are creating attribute templates and assigning the template to products. If assigning attributes directly, you replace the word attributecode with the actual code of the attribute. If assigning a template you replace the word attributecode with the template code followed by the | character followed by the specific attribute code. So in your template you might have %options:version% when the attribute called version is assigned directly. But if through a template, you might have %options:software|version%.
1) The %options:attributecode% will export the option's prompts for the attribute code you specify in the token, e.g. %options:version% would export the PROMPTS for the options in the attribute called version. So the example feed might be %product:code%%^%%options:version%. Delimiter is whatever you want to use. Then you could have a custom product field called version. You could then run a flat file import, updating existing records, and put this data into the custom field. What would you use this for, you ask? If you are using Power Search, that would make the option data searchable.
2) The %optionscode:attributecode% will export the option's code for the attribute code you specify in the token, e.g. %optionscode:version% would export the CODES for the options in the attribute called version. So the example feed might be %product:code%%^%%optionscode:version%. Delimiter needs to be comma. That will put a comma between the product code and the options. Then for the option data, it would begin with | and end with | and insert the | between each option code. So it might look like WIDGET,|5|4|3|2| on the line. Then you could have a custom product field called version. You could then run a flat file import, updating existing records, and put this data into the custom field. What would you use this for, you ask? If you are using Power Search, you could make this field into a data source for narrowing the search. The best way to understand this is to see it working. Go to the store and search on the term aa This will find all the records with aa in any of the fields, e.g. the product code. In the left column you will see the "Version" facet. It shows the options available in the store and the number of products which have that version. Most products have more than one version as options. So if you select a version 3, it would also show the count of the other versions which have 3 as one of its option codes. Of course the listed products change as you change the value in the facet to search.
Q: How can I troubleshoot category assignment problems?
A: Create a feed with this in the product section with tab as the delimiter. %product:code%%^%%product:catcount%%^%%category:all%%^%%category:xxx%
This will show you the product code and the number of categories miva thinks the product is in. It should agree with the category:all value. The category:xxx token is used to find errors. If a product is assigned to a non-existant category you will probably see something like ?594? where 594 is the ID number of the non-existant category before it was deleted some time in the past. If you see any of these, you'll need to clean up the categoryxproduct database to remove those orphaned records. If you don't know how, contact your host or miva support.
Q: How do you use the "sold" token?
A: As example, the token %sold:20120101:20120731:0-4% would show the quantity sold between the time period Jan 1, 2012 to Jul 31, 2012. The dates are written as YYYYMMDD. The 4th parameter is the range. It will export those products sold within that range. So a range of 0-0 would show only those products with no sales during the time period. 0-4 would show you no or low sales for the period. You can easily produce a tab delimited file which can be imported into a spreadsheet and analyzed. This token can only be used in MySQL stores. It also sums the quantities by product code. It does not break it down by attribute options or inventory variants.
Q: How can I export a specific image type or generated image size?
A: Beginning with TDF version 5.083 or newer the %image:custom% and %image:custom_required% tokens have been enhanced. Here is an example token - %image:custom|default|42|42|1|1% The beginning of the token is the same as the earlier token. However, if you add the | delimiters, you can specify the image type and/or size. In this example, I have an image type called "default". Other stores may use some other name, e.g. "main". If you do not want to specify an image type, leave this parameter blank, i.e. no space between the | characters. If you want to specify a width, put the number of pixels in the next parameter. If it matches a generated image width, the url will be exported. If you want to specify a height, put the number of pixels in the next parameter. If it matches a generated image height, the url will be exported. So if either of the sizes match, the first match will be exported. The next column is for fallback. If there is no size match, it will export the 1st uploaded image in the file. Typically you have your images sorted so that the first is the default or main image. If you do not want a fallback, i.e. no image url exported, leave this column blank. The next column is usually 1. However, it can be used to export the urls of multiple matches. So if you want to list 5 alternate images for a product which are 42 pixels wide or high, you would put the number 5 in the column. Course to get more than one match, you would not put an image type as that would typically find just one. Hence, %image:custom||42|42|1|5% would export a comma separated list of up to five 42 pixel generated images for the product. A variation of this token is the %image:custom_required|.. token. The parameters would be the same to get a specific image type or size. However, if the token returns nothing, the product record will not be exported.
Still have a question?