Copyright © 1999, William Weiland
The Buy X Items - Get 1 Free module gives the shopper a discount based on a predetermined qualifying number of items. In the admin module, the store owner sets the number of items it requires in order for the lowest priced item to be free.
You will install two modules (get1free.mvc and cim_log.mvc).
Install get1free.mvc
1) In admin, click Add Modules link (fig 2)
2) Click the file upload button
3) Browse to find the get1free.mvc file on your hard drive and upload (fig 3)
4) Click Add to add it to the domain
5) Then in admin click on the plus to the left of Stores
6) Click the plus to the left of your store name
7) Click on the word Utilities under your store (fig 9)
8) Check the box next to the Buy X Number of Items Get 1 Free
9) Click Update
10) Click on System Extension Configuration link
11) Check the box next to the Buy X Number of Items Get 1 Free
12) Click Update
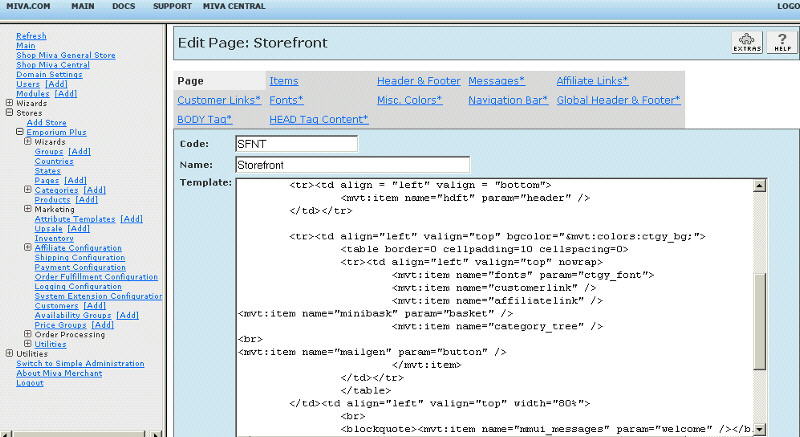
13) Click Pages link to get to the User Interface (fig 4)
14) Click Items link at the top of the User Interface page (fig 5)
15) Click the Add Item button (fig 6)
16) Enter get1free for the code
17) Look up and scroll to the last page of items and Buy X Number of Items Get 1 Free should be at the end of the list of items
18) Select Buy X Number of Items Get 1 Free
19) Click the Add button to assign the module
20) The CIM Activity Log (cim_log.mvc) may already be in your store as it is used by many of our modules. Check under the Modules link to see if it is already there. If it is there, skip to 29. If not, then go to 21.
Install cim_log.mvc
21) Again, click Add Modules link
22) Click the file upload button
23) Browse to find the cim_log.mvc file on your hard drive and upload
24) Click Add to add it to the domain
25) Click on the Logging Configuration Link
26) Check the box next to the CIM Activity Log
27) Click Update
28) Skip to 31
Update cim_log.mvc
29) Click Modules link
30) Scroll down to CIM Activity Log and click the link
31) Click the file upload button
32) Browse to find the cim_log.mvc file on your hard drive and upload
33) Click Update to update the module
Configure the module
34) Return to the Utilities Configuration screen (fig 9) and click the link for Buy X Number of Items Get 1 Free to enter the configuration settings.
Enter the order number and where you purchased the license from. Beginning with version 5.011 of the module you will also need to supply a license key before configuring the module. This is not the license key you may have received when you purchased the license, as some vendors have their own license system. This license key is obtained directly from Emporium Plus by clicking the link to "Request License Key" in the module's admin screen. 1) enter your order number and where you got it, 2) click Update, 3) request the key. Make sure the order number, domain, and store code are correctly inserted in the request form. The license key is based on these three elements. If you provided that info, the key will be sent back to you. After entering the key and saving, the module will be available for use in your store.
Quantity Percent of Lowest Item(s) to Discount Exempt Product Codes from Discounts
For every increment of the number entered, an item's value reduces the total
sale. For example, if the number is 5 and the customer buys 5, the lowest
priced item is free. If the customer buys 10, the lowest priced two items
are free.
If you run a special and then end the special for awhile, do not unassign the
module. Rather, increase the quantity to a number that would not likely be ordered.
That way the validation check will still occur and any residual baskets will
not qualify with the new setting.
You can change the percent off the lowest priced item from 100% to a lower percentage if you
don't want the item to be totally free.
Enter each product code you do not want to be included in the calculation. Make sure you put the |
character after each product code. The default action of this setting is to exclude products.
Beginning with version 5.0110 of the module there are extended settings for the product calculation.
In the exempt product box if you start the line with the + character, all the products in the box
are those used for the deal. If they are not in the box, they are not calculated.
Without the + it works as before; i.e. exempts the products.
Includes these products
+ABC|
XYZ|
Excludes these products
ABC|
XYZ|
Category setting: If you start the line with the # character, do not use product codes. Instead it is for whole
categories. So you put category codes in the list and all of the products in those categories will
inherit the category setting. If you want include, you put #+ at the beginning.
Includes products in categories
#+AA|
BB|
Excludes products in categories
#AA|
BB|
If you use the category setting and a product is in two categories, the product could be eligible
by virtue of one of the categories. Example: Product A is in categories Specials and Shirts.
Suppose the only category you make eligible is Specials, the products in the Specials will be
counted even through you did not list Shirts as eligible.
The first one or two characters in the product exemption input determines whether the module will include or
exclude products, either as individuals or by category. You cannot mix the codes, i.e. you cannot use
some product codes and some category codes or some include and some exclude.
The module is called within specific template screens with render tokens. They are in the format of
<mvt:item name="itemcode" param="xxxx" />
The templates are listed at the Pages link. You will edit the template by inserting the token and clicking the Update (fig 7). Important: After adding the render token to a template page, you must click the Items link for that page, scroll down to the item name and assign it to the page (fig 8). These two steps are repeated for every page that a module's render token is used on.
This module has one token available
<mvt:item name="get1free" param="basket_message" />
It is placed on the 'bask' page template. Click on that page edit. Then at the top of the page you will see a link for Basket Contents. Click that link and scroll down the template to a point just before the basket:charge display. This will put it in a location that is clearly visible to the customer when they view the basket. It displays a message that one more and they will get the free item (or whatever verbage you use for your message). Below is the code to enter. I have included the existing first line of the basket:charge loop so that you can easily find the recommended insertion point for this token.
<tr>
<td colspan="6" align="center">
<font color="#ff0000">
<mvt:item name="get1free" param="basket_message" />
</font>
</td>
</tr>
<mvt:foreach iterator="charge" array="basket:charges">