Copyright © 2001, William Weiland
Combine several related products into a kit and offer them as a group price. You can also combine unrelated products to establish a bundle offering.
1) In admin, click Add Modules link (fig 2)
2) Click the file upload button
3) Browse to find the kitmaker.mvc file on your hard drive and upload (fig 3)
4) Click Add to add it to the domain
5) Then in admin click on the plus to the left of Stores
6) Click the plus to the left of your store name
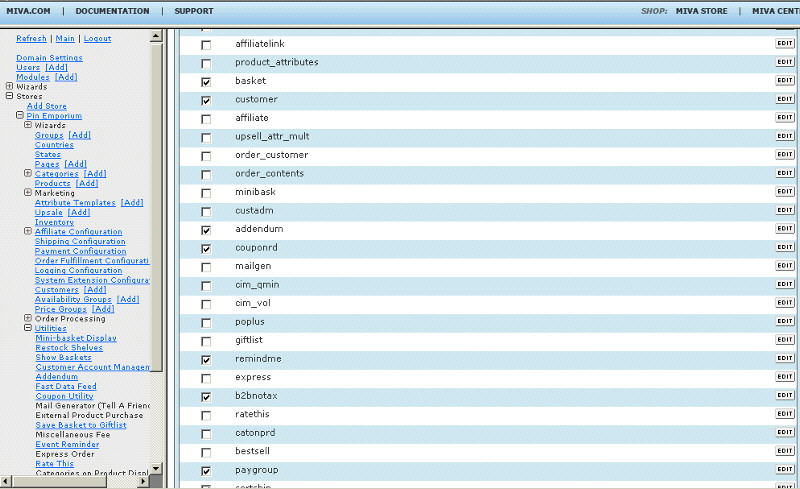
7) Click on the word Utilities under your store (fig 8)
8) Check the box next to the Kit Maker
9) Click Update
10) Click Pages link to get to the User Interface (fig 4)
11) Click Items link at the top of the User Interface page (fig 5)
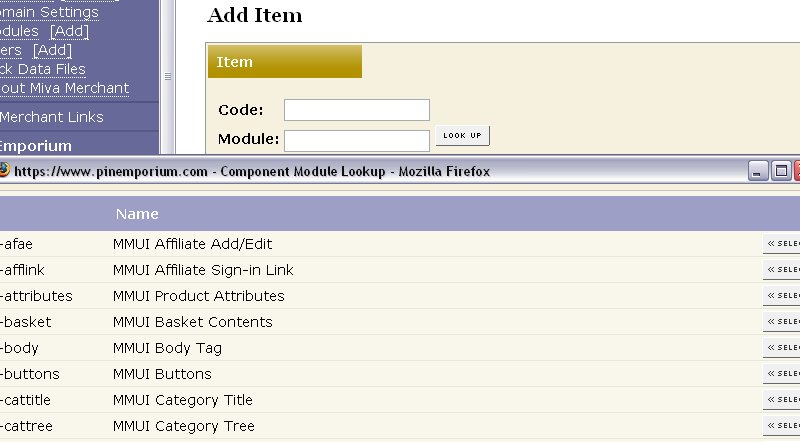
12) Click the Add Item button (fig 6)
13) Enter kitmaker for the code
14) Look up and scroll to the last page of items and Kit Maker should be at the end of the list of items
15) Select Kit Maker
16) Click the Add button to assign the module
17) Go to the page template for the PROD page (admin > store > pages)
18) Click Items at the top of the page on the right
19) Scroll to the end and check the box next to Kit Maker (fig 7)
20) Click the Update button
21) Configuration settings are accessed through the individual product editing screen of the products you want to make into kits. Click on the tab link called Assemble Kit.
Enter data into the applicable input fields.
Auto-calculate Price
If you check the box, when you update the kit components, it will automatically change the
kit product price.
Auto-calculate Weight
If you check the box, when you update the kit components, it will automatically change the
kit product weight.
Discount Rate
Enter numbers only for the percentage of the aggregate total that you want
discounted. If you enter 0.00 (zero), the kit price will equal the aggregate
total of the component prices. If you enter 10.00, the kit price will be
10% less than the aggregate total.
Product Codes in Kit
Enter one product code per line. Each line must be terminated with a ^
character.
Create Component List Array
This creates an array of the products in the kit which can then be displayed using
store morph code on the product page.
Cost Field Calculation
In most stores the amount that is charged customers is based on the price field.
Hence the cost field is available for other uses. This option determines what
will go in the cost field for kits. It can sum the cost field of each of the
components and apply or not apply the discount rate for the kit. Or it can
sum the price field of each of the components and not apply the discount. These
calculations are useful if you want to strike through the amount which looks at
the cost field as analagous to the MSRP (retail) and the price field as the
selling price.
You can automatically display the components in the kit on the kit's product page. Make sure you have assigned the kitmaker item to the items list (steps 17-20). Then insert the below code in the Product Display Layout tab of the PROD page template.
<mvt:if expr="l.settings:kit_number_items GT 0">
<tr>
<td align="left" valign="middle" colspan="2">
<mvt:item name="fonts" param="body_font">
&mvte:kit_number_items; items in this kit
<br>
&mvte:kit_savings_percent; savings
<br>
You save &mvte:kit_savings_amount;
<br>
Sum of individual prices: $&mvte:kit_cumulativeprice;
<br>
Average price per item: &mvte:kit_average_price_per_item;
<table>
<mvt:foreach iterator="component" array="kit_product">
<tr>
<td>
<a href="&mvt:global:sessionurl;Screen=PROD&Product_Code=&mvta:component:code;&Store_Code=&mvte:global:store:code;">
&mvte:component:name;</a>
</td>
<td>
&mvte:component:code; </td>
<td>
<mvt:if expr="NOT ISNULL l.settings:component:thumbnail">
<img src="&mvte:component:thumbnail;" border="0" width="60" height="40">
<mvt:else>
</mvt:if>
</td>
<td>
(&mvte:component:quantity;) </td>
<td>
&mvte:component:formatted_price;</td>
</tr>
</mvt:foreach>
</table>
</mvt:item>
</td>
</tr>
</mvt:if>
The kit price is calculated by identifying each component in the list, looking up it's price and cost, summing the totals, then applying the discount rate to arrive at a new price for the kit. This multi-step process will occur at two different times. I considered other trigger points but it would have significantly effected performance when importing products from a flat file.
- Assemble Kit in Product Editing - when you click the Update button
- Product Screen displayed - when a customer views the individual product screen for the kit
The kit does not have inventory management oversight of the individual components. If you are using any of the various inventory management systems, you will need to adjust the inventory of the kits manually.


