Copyright © 2005, William Weiland
This plugin module inserts the category tree at the location you want it on the screen. Normally that would be on the left column. This module gives you template access to the actual links so you can change them to be more search engine friendly.
1) In admin, click Add Modules link (fig 2)
2) Click the file upload button
3) Browse to find the mytree.mvc file on your hard drive and upload (fig 3)
4) Click Add to add it to the domain
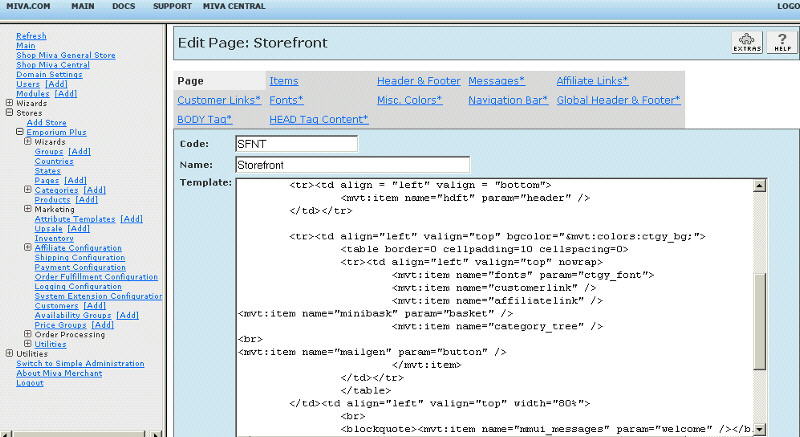
5) Then in admin click on the plus to the left of Stores
6) Click the plus to the left of your store name
7) Click Pages link to get to the User Interface (fig 4)
8) Click Items link at the top of the User Interface page (fig 5)
9) Click the Add Item button (fig 6)
10) Enter mytree for the code (fig 8)
11) Look up and scroll to the last page of items and My Category Tree should be at the end of the list of items
12) Select My Category Tree
13) Click the Add button to assign the module
14) The tree template can be modified to change the links at the store edit screen or from the individual pages edit screen. The template is globally used so need only be changed at one location. The links in the default template are the standard links Miva Merchant uses.
15) The default "original" template consists of code for four levels of categories. You can add more levels by following the code example. The maximum level depth for this tree is ten.
16) See mytree_example.txt for an example of directory style links (DSL) and the corresponding .htaccess file which makes them functional. IMPORTANT: Your server needs to be able to use .htaccess re-write in order to use these directory style links. If you don't have that re-write capability or don't know how to construct the applicable .htaccess file, use the default "original" links. Create the .htaccess file first and make sure the DSL links will work before using this example tree.
The module is called within specific template screens with render tokens. They are in the format of
<mvt:item name="mytree" />
The templates are listed at the Pages link. You will edit the template by inserting the token and clicking the Update (fig 7). Important: After adding the render token to a template page, you must click the Items link for that page, scroll down to the item name and assign it to the page (fig 8). These two steps are repeated for every page that a module's render token is used on.
1) On every page that you want the category tree, you will insert the render token
<mvt:item name="mytree" />
Actually you should find the current category tree token <mvt:item name="category_tree" /> Simply change the category_tree to mytree. Don't forget to click the items link and assign the mytree item to each page you insert the render token on. Note: While you will replace the category_tree token with the mytree token, do not completely remove the category_tree component from the pages' items lists. It will still be used to collect the tree image urls when you edit the categories and will be available to add the images paths to the array when the page runs.
2) This module also creates an array you can use to display subcategories under the main category name in the main part of the screen. You would simply edit the CTGY page template and add the following code below the category name.
<table><tr>
<mvt:foreach iterator="child" array="children">
<td align="left" valign="bottom" nowrap>
<mvt:item name="fonts" param="body_font">
<a href="&mvt:global:sessionurl;Screen=CTGY&Store_Code=&mvta:store:code;&Category_Code=&mvta:child:code;">
<u>&mvt:child:name;</u></a>
</mvt:item>
</td>
<mvt:if expr = "(pos1 MOD 3 ) EQ 0">
</tr> <tr>
</mvt:if>
</mvt:foreach>
</tr></table>
3) This module also creates an array you can use to display a breadcrumb trail of categories, from the current up to the top level. You would simply edit the CTGY page template and add the following code where you want the trail to appear.
<mvt:item name="mytree" param="trail" />
<mvt:if expr="NOT ISNULL g.mytree_trail">
<a href="&mvt:global:sessionurl;Screen=SFNT&Store_Code=&mvta:store:code;">
<u>Home</u></a>
<mvt:foreach iterator="cat" array="global:mytree_trail">
<mvt:if expr="pos1 GT 1">
>
</mvt:if>
<a href="&mvt:global:sessionurl;Screen=CTGY&Store_Code=&mvta:store:code;&Category_Code=&mvta:cat:code;">
<u>&mvt:cat:name;</u></a>
</mvt:foreach>
</mvt:if>