Copyright © 2003, William Weiland
Prevents the purchase of specific products in your store which cannot be exported outside your export eligible country list. It can be configured through admin to restrict states instead of countries.
1) In admin, click Add Modules link (fig 2)
2) Click the file upload button
3) Browse to find the restrict.mvc file on your hard drive and upload (fig 3)
4) Click Add to add it to the domain
5) Then in admin click on the plus to the left of Stores
6) Click the plus to the left of your store name
7) Click on the word Utilities under your store (fig 9)
8) Check the box next to Restrict Export
9) Click Update
10) Click the link for Restrict Export on that screen to configure the module
11) Choose whether the module will be used for countries or states. If states, enter the two letter country code in the input to the right
12) Enter the countries or states, as applicable
13) Enter the products that will be restricted outside the eligible locations
14) Edit the message if necessary.
15) Click Pages link to get to the User Interface (fig 4)
16) Click Items link at the top of the User Interface page (fig 5)
17) Click the Add Item button (fig 6)
18) Enter restrict for the code (fig 8)
19) Look up and scroll to the last page of items and Restrict Export should be at the end of the list of items
20) Select Restrict Export
21) Click the Add button to assign the module
The module is called within the osel template screen with render tokens. They are in the format of
<mvt:item name="itemcode" param="xxxx" />
The templates are listed at the Pages link. You will edit the template by inserting the token and clicking the Update. Important: After adding the render token to a template page, you must click the Items link for that page, scroll down to the item name and assign it to the page (fig 8).
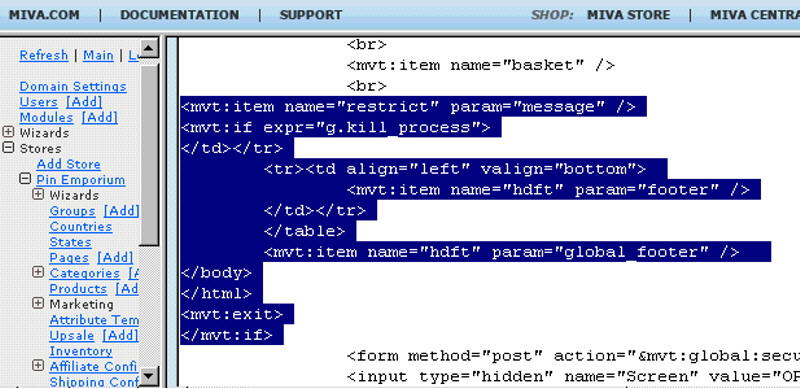
1) On page 'osel' (shipping/payment selection), insert <mvt:item name="restrict" param="message" /> just after the basket display.
2) Additionally, on the osel page you will add several lines which will be used to terminate the page if there are restricted products in the basket. See the fig 7 for specific details.