Copyright © 1999, William Weiland
The sorter.mvc module gives you the ability to sort your categories and products. You can sort the categories by name or code and the products by name, code, price, or entry date (internal ID number). Product sorts can be done either ascending or descending.
You will install one module (sorter.mvc).
1) In admin, click Add Modules link (fig 2)
2) Click the file upload button
3) Browse to find the sorter.mvc file on your hard drive and upload (fig 3)
4) Click Add to add it to the domain
5) Then in admin click on the plus to the left of Stores
6) Click the plus to the left of your store name
7) Click on the word Utilities under your store (fig 9)
8) Check the box next to the Sort Categories and Products
9) Click Update
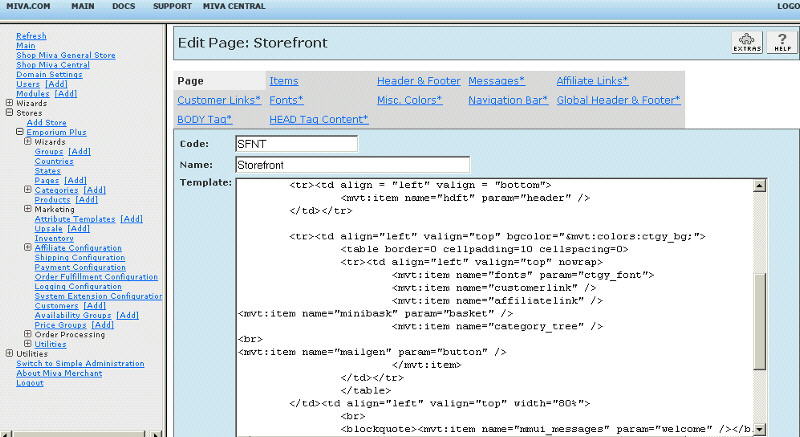
10) Click Pages link to get to the User Interface (fig 4)
11) Click Items link at the top of the User Interface page (fig 5)
12) Click the Add Item button (fig 6)
13) Enter sorter for the code
14) Look up and scroll to the last page of items and Sort Categories and Products should be at the end of the list of items
15) Select Sort Categories and Products
16) Click the Add button to assign the module
Configure the module
17) Return to the Utilities Configuration screen (fig 9) and click the link for Sort Categories and Products to enter the configuration settings
1) Label for Count: As example, you could put (%category_count%)%category_parent% in the input. The first token will display the count in the category. The second will display a character of your choosing if the category is a parent category and there are sub-categories that can be viewed.
2) Parent Token Replacement: As example, a + character would display the + after the category name if it is a parent.
3) Number for Image: If the product order number is less than the trigger, it will display the chosen image. You can have multiple tiers and images. For example 7|25 would display the first image if the order number is less than 7 and the second image if 7 or more but less than 25.
4) Image path: Path of the images. If you have multiple tiers you can have multiple images. In the above example you could have graphics/new.gif|graphics/sale.gif which would display the new image for the first tier and the sale image for the second tier.
1) In admin, click on Stores
2) Click the plus sign to the left of your store name
3) Click the plus sign to the left of Utilities under your store
4) Click the link to the Sort Categories and Products
5) Choose the desired sort order
1) Sort Categories - You can sort the categories by name, code, or entry date. Many stores find that their categories are best sorted by category code rather than category name. This way they can create codes which will put their categories in the order they want. While most may actually coincide with category names being alphabetical, stores can rearrange the categories to put things like "Specials" or "Close Out" at the top of bottom of the list. The customer does not see the category code, they only see the results of the sorted list.
2) Sort Products - The products can be sorted by name, code, price, or entry date. The product sorting can be done either as either ascending or descending. Most stores will sort the products by name. The very quick sort is done storewide with two button clicks. The storewide sort results in the products being sorted in all of the category screens, the product list screen, and the search screen.
3) Sort Products Within Category - You can sort the products within individual categories differently than the sorting in the store at large. So while the product list and most categories might be sorted alphabetically, you could have others sorted by price as ascending or descending. You can sort the products by a specific category and then on the next screen, make minor changes to re-arranged that sorting by changing the order number. Then apply the change or leave it as it shows on the screen. This gives you the ability to move certain products to the top for more customer visibility or group products together on the category page.
4) Move Products to Top - You can also list up to 1999 product codes in the order you want them and they can appear before any other products on the product list, search and each category screen. This ability to assign a sort order number also makes it possible to display images, e.g. new or hot, to all products with a sort order number less than the trigger levels you assign.
5) Count Products In Categories - You can also elect to count the products in each category. If you do, the counts will be available at runtime in Merchant. By having the data in a quick lookup table, Merchant does not have to count the products in each category as it displays the category list in the category tree. It simply shows the previously stored totals. This option cannot be used in stores which use availability groups to hide products from some customers because the totals would show the amounts for all products in each category. The sorter module use a render token to display the products in category total after the category name. To use that option, your store needs to have a 3rd party category tree module assigned, e.g. http://www.emporiumplus.com/go/wcw/PROD/1AAM5/1AA00216
The module is called within specific template screens with render tokens. They are in the format of
<mvt:item name="itemcode" param="xxxx" />
The templates are listed at the Pages link. You will edit the template by inserting the token and clicking the Update (fig 7). Important: After adding the render token to a template page, you must click the Items link for that page, scroll down to the item name and assign it to the page (fig 8). These two steps are repeated for every page that a module's render token is used on.
This module has tokens for including an image (e.g. new) before the product name when a product has been designated with a sort order number below the trigger number and also tokens for displaying the number of products in categories.
1) Image before product name
Locate the display in the template for the product name, e.g. &mvt:product:name; on the template pages you want this image to appear. I recommend the 'plst', 'ctgy', and 'srch' pages. Insert the render token
<mvt:item name="sorter" param="I-l.all_settings:product:id" />
just before the line for the product name display.
2) Product count in categories
If you are using the built in category tree template, you can include a render token that will set variable values for the product count and the parent category status (i.e. is the current category a parent to others). As example, here is the code used in the category tree.
<mvt:item name="sorter" param="C-l.all_settings:cattree_category:id" />
<mvt:if expr="g.CimCatCount GT 0">
(&mvt:global:CimCatCount;)
</mvt:if>
<mvt:if expr="g.CimCatParent">
+
</mvt:if>
3)Product count in categories
If you are using a 3rd party category tree module you can include a render token that will set variable values for the product count and the parent category status (i.e. is the current category a parent to others). The token changes based on the variable needed to retrieve the data. As example, here is the code used in one section of the category tree.
<mvt:item name="sorter" param="C-l.all_settings:child1:id" />
<mvt:if expr="g.CimCatCount GT 0">
(&mvt:global:CimCatCount;)
</mvt:if>
<mvt:if expr="g.CimCatParent">
+
</mvt:if>
There is an example of our modified category tree template with the product counts AND altered url links for search engine optimization which you can use for a guide.