Copyright © 2001, William Weiland
Contact/inquiry email from your customers can be launched from a form within your Merchant program. This keeps your store's email address out of view of spammer email address harvesters. It also allows you to easily change the email address you want inquiries to go to without editing html pages. You can launch the contact manager form from a button in the category column or from a static page. You can also use a http link format for launching the contact manager form from static pages or within Merchant.
There are two files in the support.zip distribution file. Unzip support.zip. Upload the support.mvc as a module (steps 1-19). The spts.mvt is a template and is copied and pasted per the instructions when you get to that step.
1) In admin, click Add Modules link (fig 2)
2) Click the file upload button
3) Browse to find the support.mvc file on your hard drive and upload (fig 3)
4) Click Add to add it to the domain
5) Then in admin click on the plus to the left of Stores
6) Click the plus to the left of your store name
7) Click on the word Utilities under your store (fig 9)
8) Check the box next to Contact Manager
9) Click Update
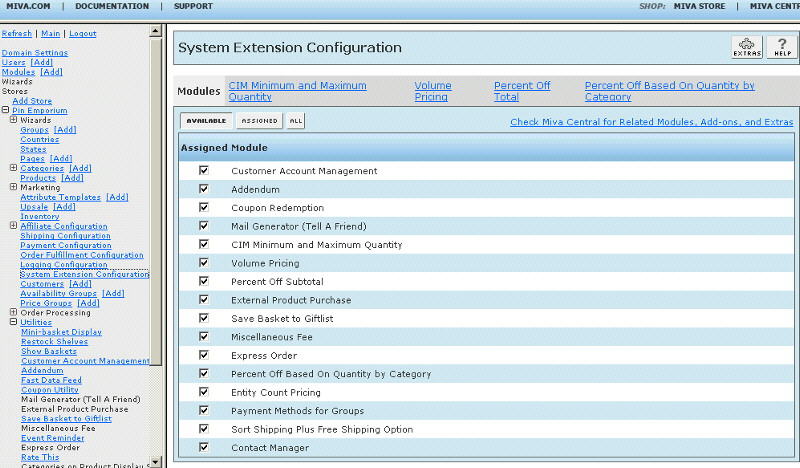
10) Click on System Extension Configuration link (fig 10)
11) Check the box next to Contact Manager
12) Click Update
13) Click Pages link to get to the User Interface (fig 4)
14) Click Items link at the top of the User Interface page (fig 5)
15) Click the Add Item button (fig 6)
16) Enter support for the code (fig 8)
17) Look up and scroll to the last page of items and Contact Manager should be at the end of the list of items
18) Select Contact Manager
19) Click the Add button to assign the module
20) Determine which Store User Interface your store is using by clicking the store name and then settings in admin. If it says "Miva Merchant Look & Feel" you have MMUI. If it says "Miva Merchant CSSUI" you have CSSUI.
21) Again, click Pages link to the User Interface (fig 4)
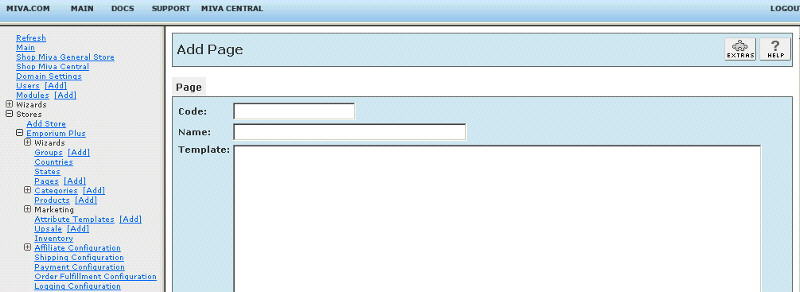
22) Click the Add Page button
23) Enter the page Code as SPTS (fig 7)
24) Enter the page Name as Contact
25) To get started, copy the contents of spts.mvt if you have MMUI or sptscss.mvt if you have CSSUI to the clipboard and paste it into the page Template input and click the Add button. Note: this is a complete page with several lines. If your text editor opens it as an html file, you will need to view source in order to copy the contents to the clipboard. When the page displays in your store, you can view the source code to see what is in the default form. If you have experience working with the MM5 template code, you can modify the SPTS page beyond the default form. As long as the form tags and inputs are maintained, you can change the form's look considerably.
26) Click on the Items link at the top and verify assignment of the following items to the page and update:
a) If you have MMUI - head, hdft, store, body, mmui_messages, category_tree, navbar, colors, fonts, customerlink, affiliatelink, support
b) If you have CSSUI - html_profile, head, store, cssui_links, navbar, customerlink, hdft, category_tree, support
27) See the editing requirements below on how to add the Contact Us button to pages in the store. You can put the button on any page. As you can see, it is already in the newly created SPTS page.
Enter data into the applicable input fields.
Category Column Button
Creates the text for the button at the bottom of the category tree.
Category Column Button Image
URL of the image file if you want to use an image for the button.
Email Subject
The subject line for the email the customer sends to your support/contact department.
Email To
The email address these contact emails will go to.
Customer Email Prompt
Text the customer sees for them to enter their email address.
Customer Inquiry Prompt
Text the customer sees for them to enter their question.
Font Color, Size and Face
Font control for the text in the support screen.
Prompt Box Color
Background color for the support screen.
Customer Form Body
Message that the customer sees at the support screen.
Customer Send Button Text
Text used for the Send button.
Customer Send Button Image
URL to image if you want to use an image for the button.
Optional Autoresponse After Inquiry
You can send the customer an email telling them that you have received their inquiry and will get back to them.
Optional Technician List
Customers can specify which department will receive the inquiry. Leaving it blank will send the email to the
default email above.
Extra Field List
You can include extra fields in the form. Follow the onscreen instructions on how to format the extra field info.
Beginning with version 5.014 of this module you can add a math challenge question at the end of the
field list. For that, simply add validation| as the last line in the field list. This should cut down on
bogus entries.
The module is called within specific template screens with render tokens. They are in the format of
<mvt:item name="itemcode" param="xxxx" />
The templates are listed at the Pages link. You will edit the template by inserting the token and clicking the Update. Important: After adding the render token to a template page, you must click the Items link for that page, scroll down to the item name and assign it to the page (fig 8). These two steps are repeated for every page that a module's render token is used on. On the pages where you want the button to appear, insert
<mvt:item name="support" param="button" />
On the spts page you have one token that renders the default form display. This form is populated by filling in the inputs on the module's admin page for things like fonts and labels. This default form is easily configured, even for those with minimal knowledge of html. This token is
<mvt:item name="support" param="support" />
If you view the page source, you will see the code for the form that this token inserts. You can copy that source to the clipboard and replace the above token in the spts page template with that form code. This will give you full design capabilities using the store morph technology of MIVA Merchant 5.x in the spts page template. This includes history recall features. If you replace the above token with the form source, you'll need to include the token that displays the error message when an error is made in the form. That token is
<mvt:item name="support" param="error" />
If you have implemented the math challenge with validation| in the field list and are going to replace the default token with the form code you will need to include the validation code in the form.
<tr>
<td align="left" bgcolor="#ffffff">
<font size="2" face="Arial, Helvetica" color="#000000">
<b>
<mvt:item name="support" param="random" />
&mvte:global:verifyA; + &mvte:global:verifyB; =
</b>
<input type="hidden" name="verifyA" value="&mvte:global:verifyA;">
<input type="hidden" name="verifyB" value="&mvte:global:verifyB;">
<font>
</td>
<td align="left" bgcolor="#ffffff">
<font size="2" face="Arial, Helvetica" color="#000000">
<input TYPE="text" NAME="verifyC" size="10" maxlength="10" value="">
</font>
</td>
</tr>
You can remove closed out records that are older than one week by checking the box next to "Delete Status = "C" records created prior to (date less one week)." If you want to delete a status other than C, just change the letter in the box.