Copyright © 2001, William Weiland
Customers can identify products that they would like to purchase but are currently out of stock. Once you place the product in stock, you can run the Send Email routine in admin. Each waiting customer will receive an email telling them that the product is back in stock.
Unzip waitlist.zip. Upload the waitlist.mvc as a module (steps 1-19). The ctwl.mvt is a template and is copied and pasted per the instructions when you get to that step.
1) In admin, click Add Modules link (fig 2)
2) Click the file upload button
3) Browse to find the waitlist.mvc file on your hard drive and upload (fig 3)
4) Click Add to add it to the domain
5) Then in admin click on the plus to the left of Stores
6) Click the plus to the left of your store name
7) Click on the word Utilities under your store (fig 9)
8) Check the box next to Wait List Manager
9) Click Update
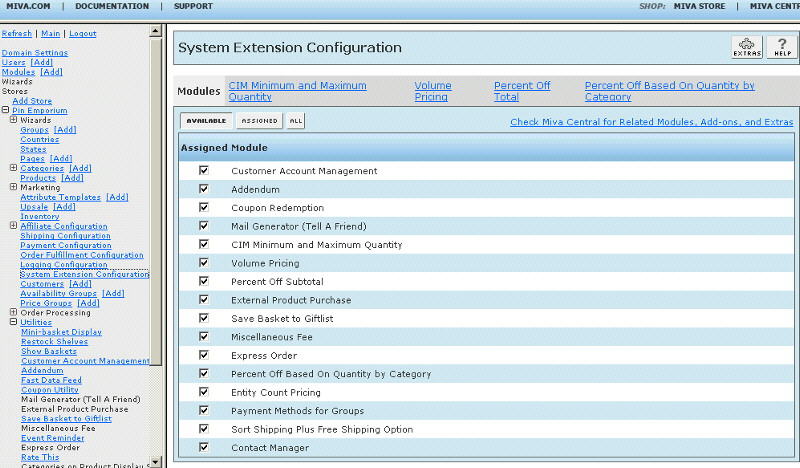
10) Click on System Extension Configuration link (fig 10)
11) Check the box next to Wait List Manager
12) Click Update
13) Click Pages link to get to the User Interface (fig 4)
14) Click Items link at the top of the User Interface page (fig 5)
15) Click the Add Item button (fig 6)
16) Enter waitlist for the code (fig 8)
17) Look up and scroll to the last page of items and Wait List should be at the end of the list of items
18) Select Wait List
19) Click the Add button to assign the module
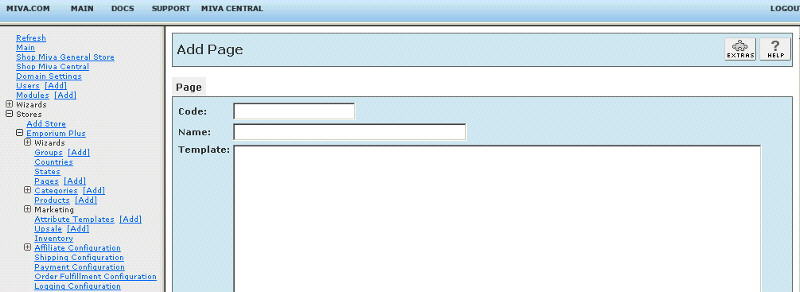
20) Again, click Pages link to the User Interface (fig 4)
21) Click the Add Page button
22) Enter the page Code as CTWL (fig 7)
23) Enter the page Name as Wait List
24) To get started, copy the contents of ctwl.mvt to the clipboard and paste it into the page Template input and click the Add button. Note: this is a complete page with several lines. If your text editor opens it as an html file, you will need to view source in order to copy the contents to the clipboard.
25) Click on the Items link at the top and assign the following items to the page and update; head, hdft, store, body, mmui_messages, category_tree, navbar, colors, fonts, customerlink, affiliatelink, waitlist
26) See the editing requirements below on how to add the Wait List buttons to pages in the store. You will put the button/link on the pages which display add and buy buttons.
Enter data into the applicable input fields.
Prompt
Enter the text or image URL for prompting customers to access the Wait List
screen. There are two prompt locations (product and category screens). The
category screen prompt is optional.
Screen Title
Enter the Wait List form title.
Screen Body
Enter the text you want to appear in the Wait List form.
Input Form
Define the color, size and font of the Wait List form.
Email Subject and Body
When the item comes in and the email is sent to the waiting customer, these
define what will be in the subject and top of the email.
Thankyou Email Body
You can optionally send an email when customers sign up to the Wait List.
Expire
Establish how many days the Wait List will remain before it is cancelled.
Block Automatic Wait List Prompt
Blocking product codes. If you are using Miva's Inventory Management module in
conjunction with this module, the link to the Wait List will be automatically
inserted when the product quantity drops to zero. However, there may be
some products that you don't want Wait Listed. You simply add the product
code followed by a | symbol in the admin configuration screen to block the
link display.
The module is called within specific template screens with render tokens. They are in the format of
<mvt:item name="itemcode" param="xxxx" />
The templates are listed at the Pages link. You will edit the templates by inserting the token and clicking the Update. Important: After adding the render token to a template page, you must click the Items link for that page, scroll down to the item name and assign it to the page (fig 8). These two steps are repeated for every page that a module's render token is used on. On the pages where you want the button/link to appear, insert
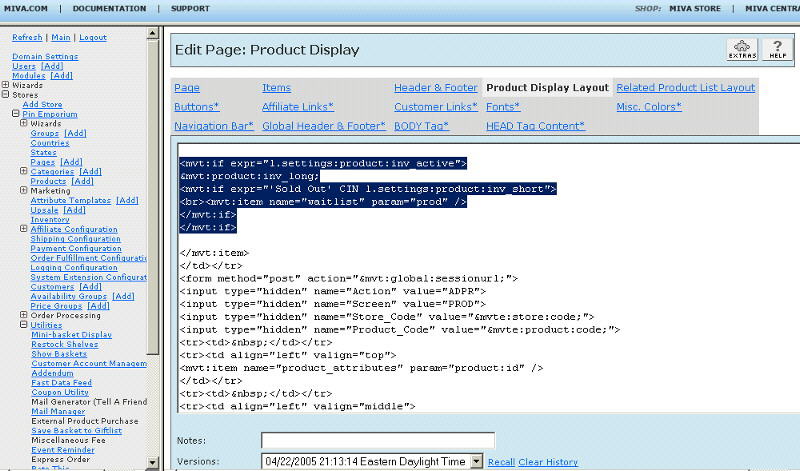
1) 'prod' page template (fig 11)
<mvt:item name="waitlist" param="prod" />
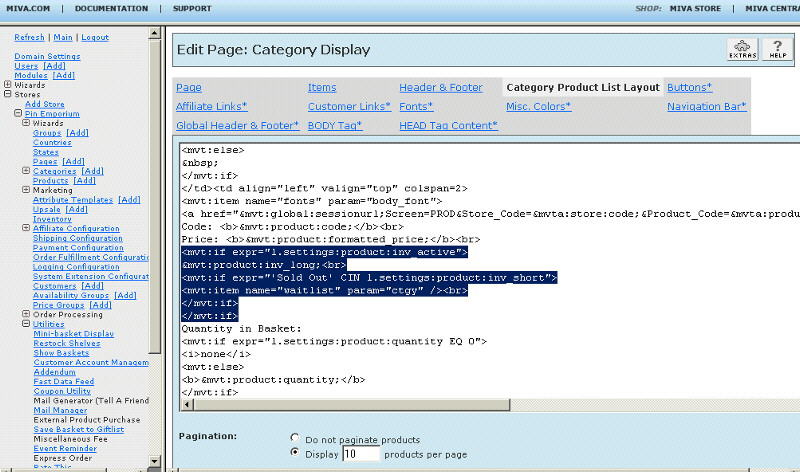
2) 'ctgy' page template (fig 13)
<mvt:item name="waitlist" param="ctgy" />
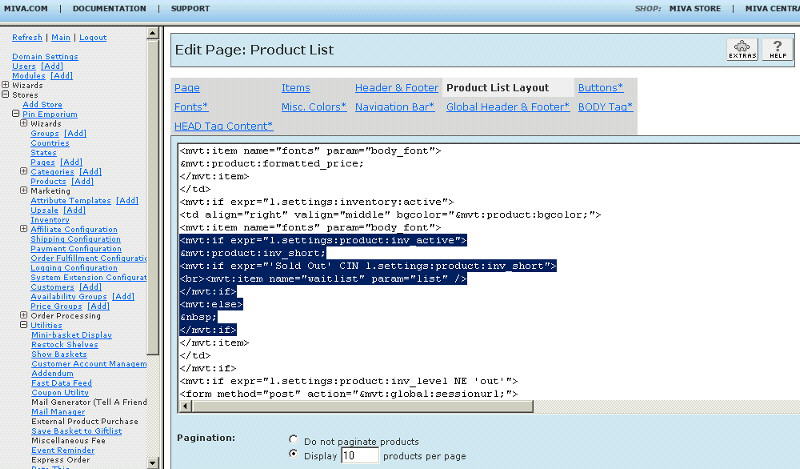
3) 'plst' page template (fig 12)
<mvt:item name="waitlist" param="list" />
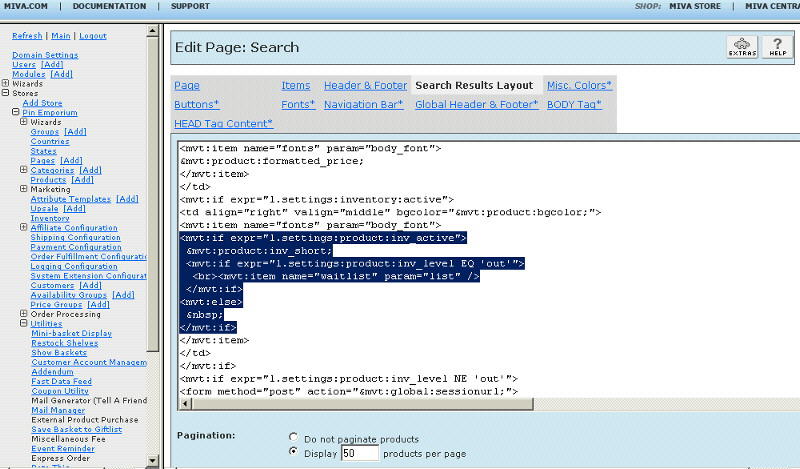
4) 'srch' page template (fig 14)
<mvt:item name="waitlist" param="list" />
Alternate display of wait list link. As example, if you do not want to use the preformed link or your page template layout has variables changed that make it not work, you can easily construct the link that will send the customer to the wait list form. Here is an example of code you could use on a category screen.
<mvt:if expr="l.settings:product:inv_level EQ 'out'">
<a href="&mvt:global:sessionurl;Screen=CTWL&Store_Code=&mvta:global:Store:code;&Category_Code=&mvt:global:Category_Code;&Product_Code=&mvta:product:code;&Offset=&mvta:global:Offset;">
Wait List</a>
</mvt:if>
Wait list notices can be sent out for all products with a quantity greater than zero (if you are using Miva's Inventory Management module) by clicking the image to the left of the word Utilities in the store admin. Then click on the link for Wait List Manager. Wait list notices can be sent out on an individual product by selecting the individual product editing screen. Then click on the link for Wait List. You can send one or more (including all waiting customers) notices by checking the box(es) and selecting Update. This would be the method for sending notices if you are not using an Inventory Management module or you just want to send notices limited to one product. You can also remove waiting customer records by checking the box in the appropriate column and selecting Update.